Managing Credit Notes
Through this guide, you will learn how to manage credit notes in Maatdesk so that the client does not have to pay the full amount of the invoice.
All actions described in this guide will be performed after creating a bill.
Table of contents
Creating a Credit Note
To create a credit note:
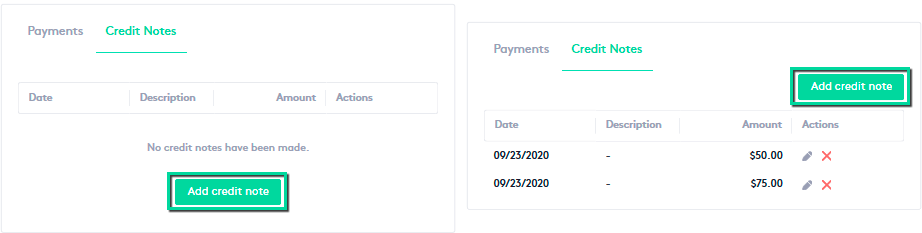
- Go to the Billing Details window where the credit note will be created.
You can access this window by clicking on an invoice ID, as long as it is underlined in Maatdesk.
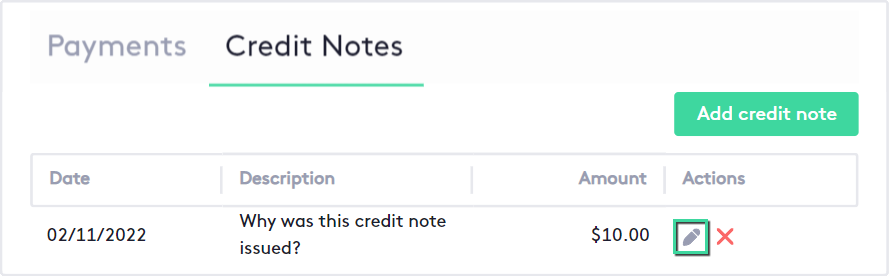
- Click the Credit Notes tab.
- Click the Add credit note button.
Credit notes can only be created when the invoice is in Approved status.
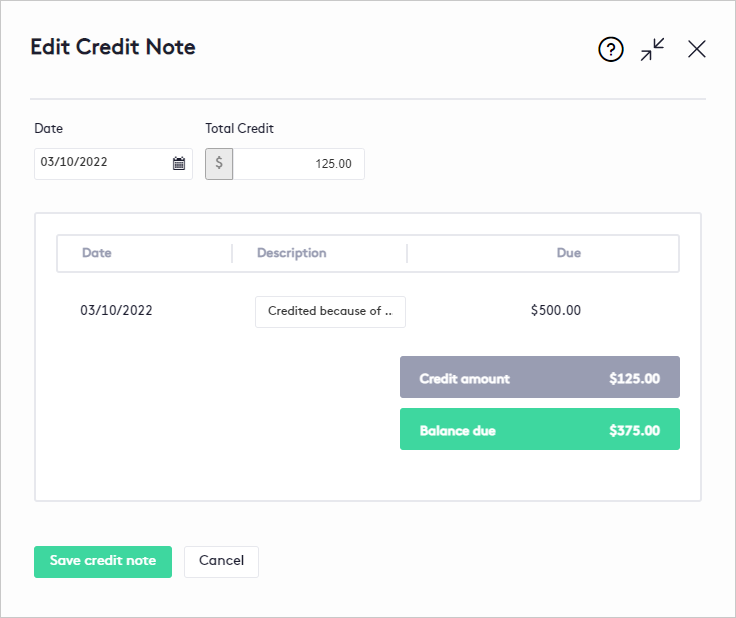
After the Create Credit Note panel is displayed, fill in the field as follows:
- Date: Select the issue date if necessary, by default it will be the current date.
- Total Credit: Enter the amount to be credited, Maatdesk will correct this value if it exceeds the total due.
- Description: Enter a brief description of the credit note, for example, the reason it is issued.
To help you create the credit note, Maatdesk displays three fields:
- Due: Displayed next to the Description, this field indicates the amount due on the invoice.
- Credit amount: This field coincides with the Total Credit value and will be the amount for which the credit note will be issued.
- Balance due: This field represents the remaining amount to pay for the invoice, once the credit note has been created.
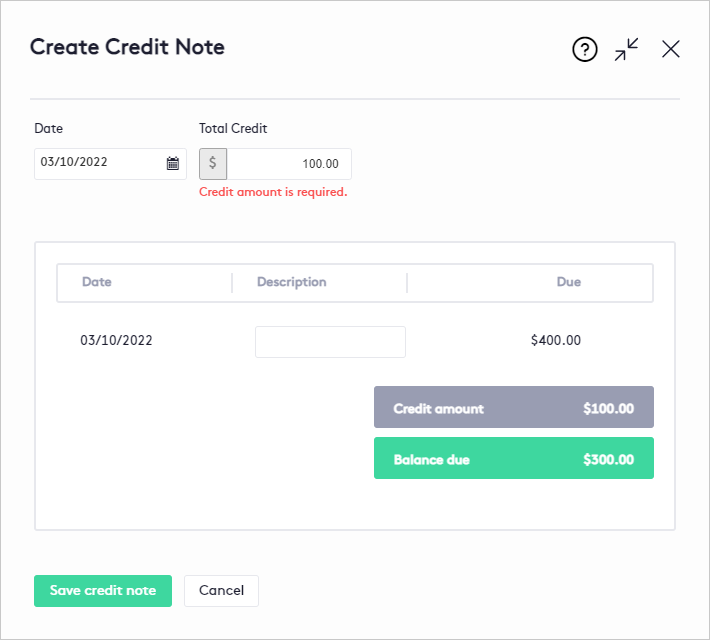
When done, click the Save credit note button.
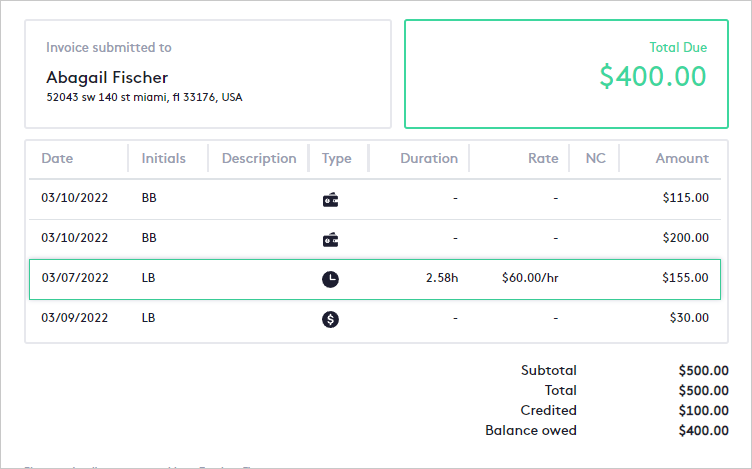
After creating the credit note, the client will not have to pay the full amount of the invoice (for example, if the client has a $500 invoice and a $100 credit note, they will only have to pay $400).
Editing a Credit Note
To edit a credit note:
- Go to the Billing Details window where the credit note will be edited.
You can access this window by clicking on an invoice ID, as long as it is underlined in Maatdesk.
- Click on the Credit notes tab.
- Click the Edit (
 ) button on the right side of the credit note.
Credit notes can only be edited when the invoice is in Approved or Paid status.
After the Edit Credit Note panel is displayed:
- Edit the credit note following the same steps as when you created a new one.
- Click the Save credit note button.
Maatdesk will correct the credit amount if it exceeds the total due.
Deleting a Credit Note
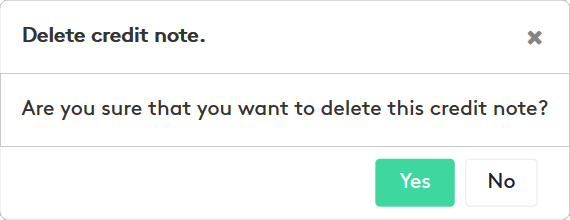
To delete a credit note:
- Go to the Billing Details window where the credit note will be deleted.
You can access this window by clicking on an invoice ID, as long as it is underlined in Maatdesk.
- Click on the Credit notes tab.
- Click the Delete (
 ) button on the right side of the credit note.
Credit notes can only be deleted when the invoice is in Approved or Paid status.
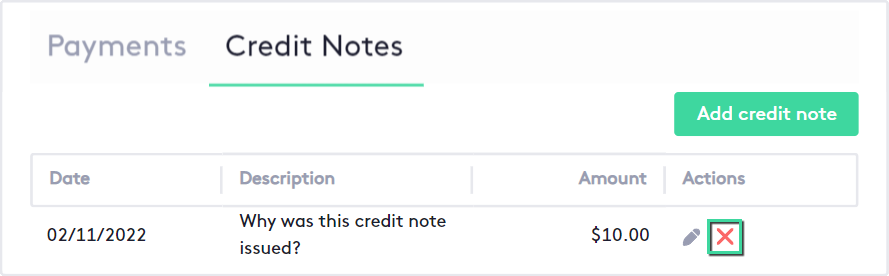
After the modal is displayed, click Yes to confirm.