Managing Users
In this guide, you will learn how to manage your firm’s users by inviting them to Maatdesk, editing their information, setting up their roles and groups, and more.
Table of contents
Accessing the Users window
To access the Users window:
- Click the Settings (
 ) link on the left side panel.
 - Click on the Manage Users block.
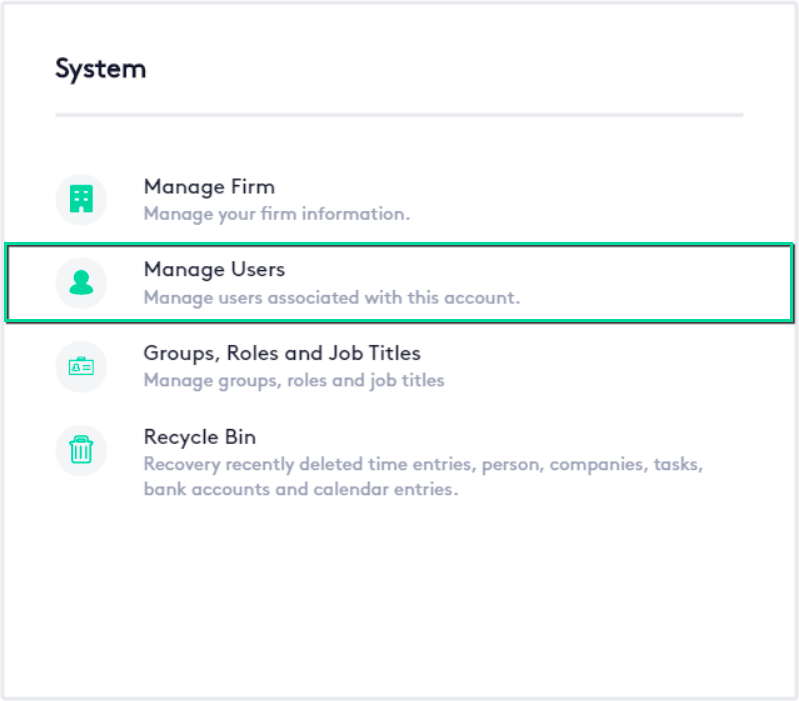
You can invite users to your Maatdesk account and manage them, whether they are confirmed or invited, from this window.
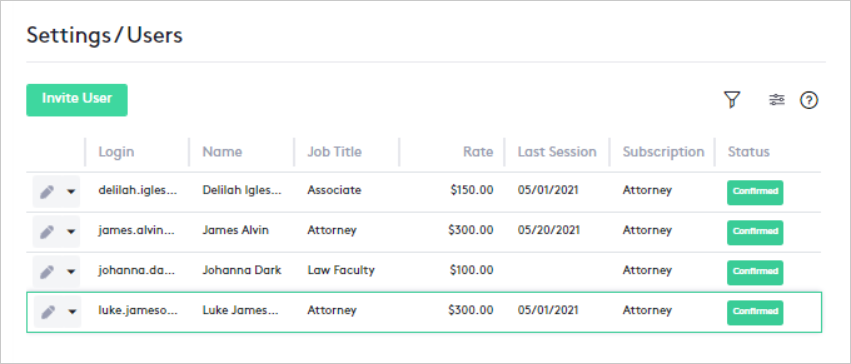
Inviting Users
Once in the Users window, click the Invite User button.

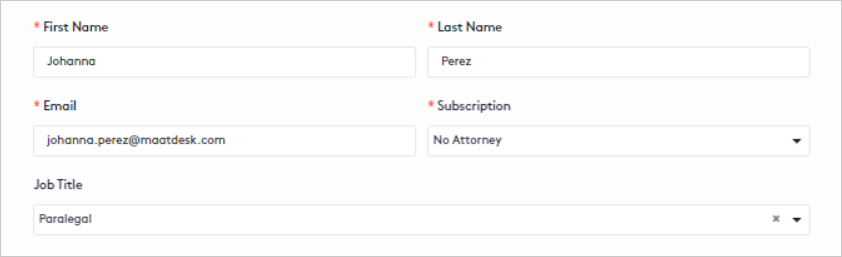
In the panel that is displayed, fill in all the fields as follow:
- First Name and Last Name: Enter the full name of the user to invite.
- Email: Enter the user’s email.
This field will be used as:
- The address where Maatdesk will send the invitation card to start using the application.
- The address that Maatdesk will use to perform all the operations required by the system related to the user, once the invitation has been accepted.
- Along with the password that the user establishes once the invitation has been accepted, their credential to access Maatdesk.
- Subscription: Select a subscription type.
- Job Title: Select the position that the user to invite will occupy within the firm.
Maatdesk offers a predefined list of existing job titles, if these are not enough, you must first create a new one.
- Message: Enter a message to send to the user in the body of the invitation card.
- Groups: Select all the groups that the user will be associated with.
Groups allow associating users according to their practice areas or job titles, among other common elements.
- Roles: Select the roles that the user will have in correspondence with what they will be able to do.
Each role in Maatdesk establishes a set of permissions on the actions that a user or group can perform.
- Time Zone: Select the time zone the user is in.
This field is of vital importance in Maatdesk to create events or invitations, display notifications, and other elements that depend directly on the set value.

Once you have filled in all the necessary fields, click the Invite button.
Consider the following items after inviting a user:
- An invitation to a user can only be made once, as the email addresses of existing users in Maatdesk cannot be repeated.
To send an invitation to an existing email, read the section Resending an invitation.
- It is recommended that after you have invited a user, you edit it to fill in other necessary fields.
- Read the Accepting an invitation section to learn how an invited user should do this.
Resending an Invitation
If it’s been a while and a user has not accepted an invitation yet, do the following:
- Click the action selector next to the Edit (
 ) button at the beginning of the invited user’s row.
 - Click the Resend Invitation (
 ) button.

After clicking the button, a new invitation card will be sent to the invited user’s email.
Consider the following items before resending an invitation:
- You will not be able to resend invitations to Confirmed users, only those in Invited status.
- To improve your time, it is recommended to use the filter panel, especially the Login, Name, and Status filters.

Editing a User
To edit a user, at the beginning of the user’s row, use one of these options:
- Click the Edit () button.
- Click the action selector and then click the Edit (
 ) button.

Once the panel is displayed:
- Edit or fill in all the necessary information.
- Click the Save button.
Note that when editing a user for the first time, regardless of their status, new fields must be filled in. It is recommended to do this to have more complete information about the user, in addition, Maatdesk uses some of these elements.
To edit the existing fields, you can read the section Inviting a User. How to fill in the new fields is explained below:
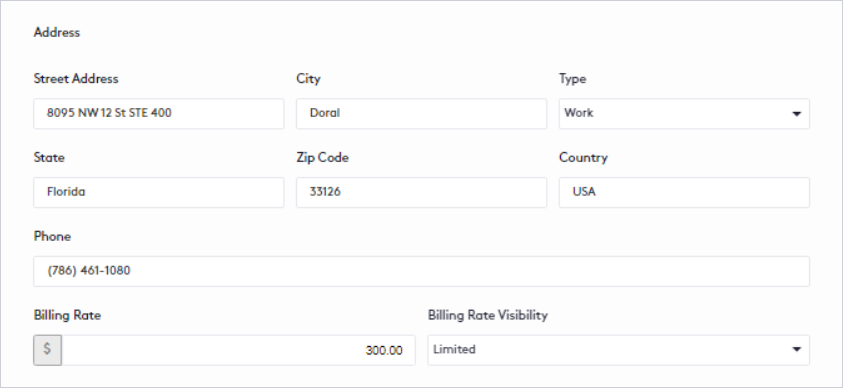
- Address fields: This section constitutes the full address of the user. Enter the corresponding value in each field and select the address Type.
- Phone: Enter the user’s phone number.
- Billing Rate: Set the amount the user will charge per working hour.
The value of this field will be displayed when creating time entries.
- Billing Rate Visibility: Select how the visibility of billing rates for the user will be restricted when creating time entries:
- All: The user will see all the rates.
- Limited: The user will see only their own rates.
- None: The user will not be able to see any billing rates.
- Email Settings: By clicking this button, it is possible to directly integrate an email account for the user.
Read the Email Integration guide for more information.
Deleting a User
To delete a user:
- Click the action selector next to the Edit () button at the beginning of the user’s row.
- Click the Delete (
 ) button.

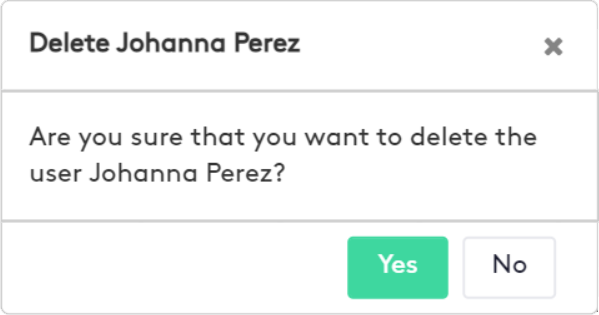
- In the Delete User modal, click Yes to confirm the action.
When deleting a user, keep the following items into account:
- A user with related matters cannot be deleted.
- The user will be sent to the Trash, where they can be restored later or permanently deleted.