Getting started with Time entries
In this tutorial, you will learn the basic steps of working with time entries, so that you can easily and efficiently record the time spent on any action.
Table of contents
- Creating a Time entry
- Rate setting strategy
- Maatdesk timekeepers behavior
- Editing a Time entry
- Deleting a Time entry
Creating a Time entry
To start creating a time entry, do one of the following:
- Click the Add Time button in the Activities window or the Activities tab of a Matter dashboard.

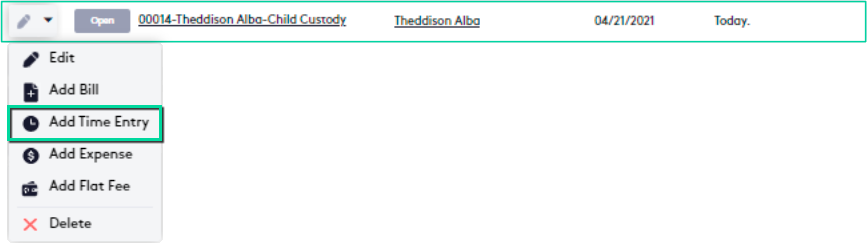
- In the Matters window or the Matters tab of a Contact dashboard:
- Click the action selector next to the Edit (
 ) button at the beginning of the matter row in the table.
- Click the Add Time Entry button.
- Click the action selector next to the Edit (
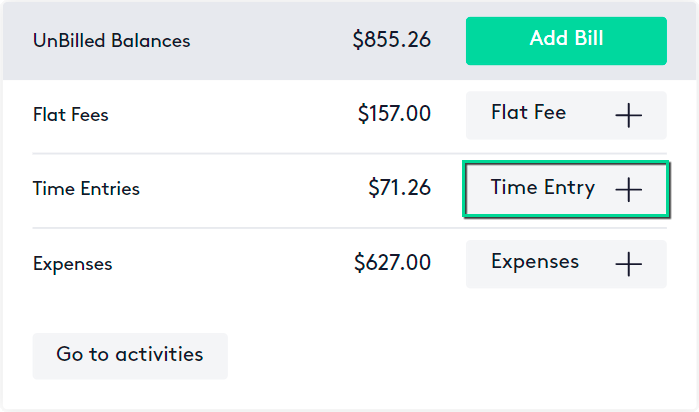
- Click the Time Entry button in the Financials widget of a Matter dashboard.
- When creating or editing a Note, calendar Event, or Task, click the Save and Associate Time Entry button available if those items are related to a matter.

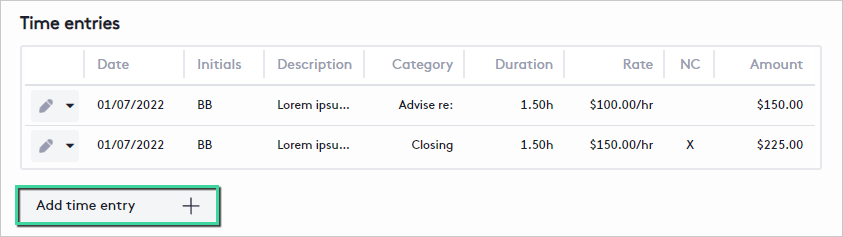
- When creating or editing a Quick Bill, click the Add time entry button.
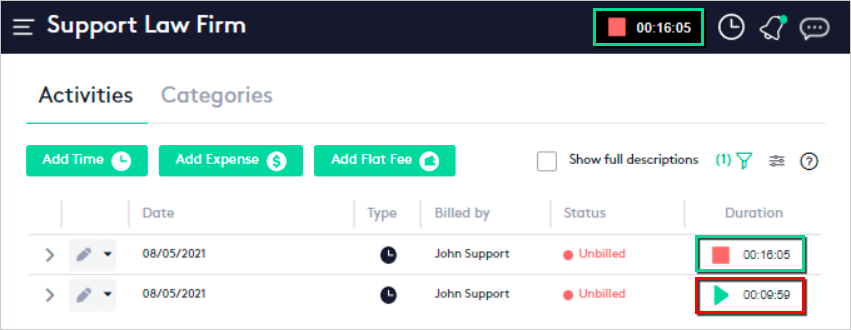
- Start the timekeeper (
 ) on the right side of the top bar:
- The time entry will be saved automatically.
- Once the timekeeper stops, it is recommended to fill in the empty fields.
You cannot create time entries for Closed matters.
Adding a time entry from the Add Time Entry panel
In the Add Time Entry panel, you can create two types of entry:
- A “No Matter” time entry.
- A time entry for a matter.
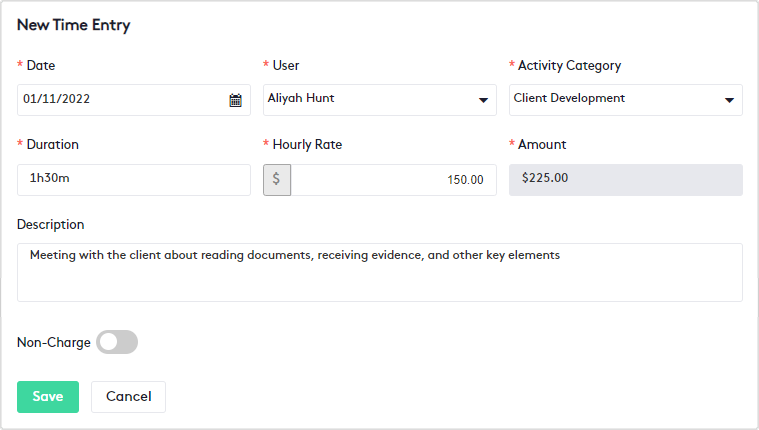
To create a time entry, fill in or change the fields as described below:
- Check the “No Matter” time entry option if the entry is not associated with a matter.
- The Matter, Rate, and Non-Charge fields will not be available.
- The time entry will be Non-Billable by default.
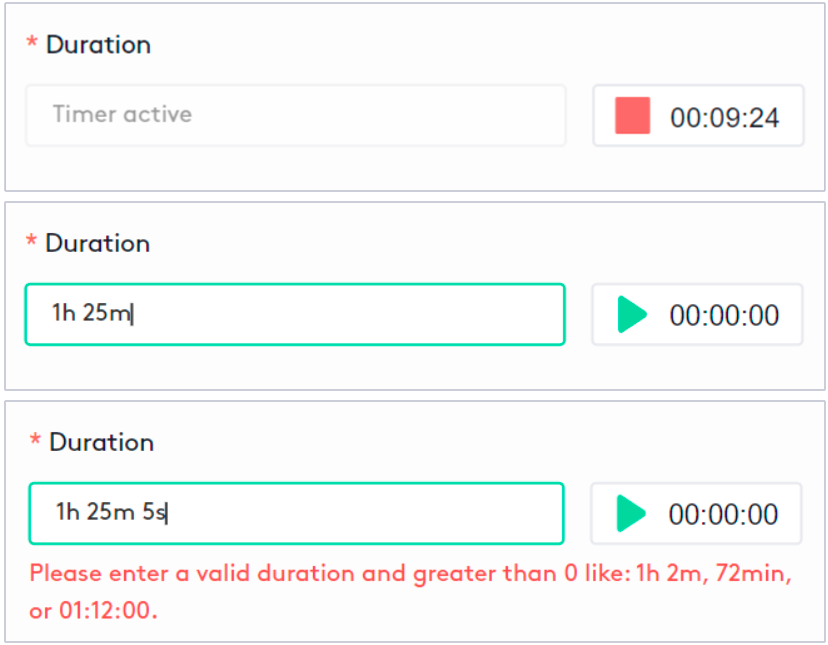
- Duration: Enter the time spent on the action performed (e.g., a task, calendar event, or phone call).
There are two variants to fill it in:
- Start/stop the included timekeeper next to the field, this can only be done if you are the user of the entry.
- Enter the time manually.
Time entries allow a variety of duration formats such as 1h 2m, 1h2m, 72min, 01:12:00, or 0.2h (equivalent to 20% of an hour).
- Matter: Select the matter for which the time spent will be recorded.
- Depending on where the entry will be created or if it is of type “No Matter”, this field cannot be modified.
- Closed matters will not be shown.
- Activity Category: Select a category to classify and bill the entry.
If a category is not listed, it must be created first.
- Date: Change the creation date of the entry, if necessary, by default it will be the current date.
- User: Select the user who will bill the activity.
- Rate: If a matter is selected, this field is automatically filled in according to the Billing Method defined in the selected Activity Category.
It is highly recommended that you read the Rate setting strategy section for more information.

- Description: Write a short note about why the time entry is created.
- Non-Billable: Check if the time entry will not be reflected in the invoices.
This option will be checked by default if:
- The entry is of the type “No Matter”.
- The selected matter is not billable.
- The selected matter is billable and the billing method is different than “Hours”.
- Non-Charge: Check if the client will not be charged for the time spent.
- This option is available only if the Non-billable option is not checked.
- With this option the entry is shown on an invoice but, as it is not charged, taxes will not be applied either.
When you are done, you can Save or Save And Add Another entry and fill in or change the fields as described above.
After a time entry is created, if the Non-billable option was unchecked:
- The entry is saved in the Unbilled status.
- The balance of Time Entries is updated in the Financials widget of the selected matter.

Adding a time entry from a Quick Bill
You can create as many time entries as you need directly from a bill that you creating or editing:
- Click the Add time entry button.
- Fill in or change the values as described in the previous section.
- Click the Save button.
- Repeat the process for each entry to create.
When creating time entries in this way, keep the following in mind:
- Time entries created in this way cannot be set to Non-Billable or “No Matter”.
- The Duration field is set by default to one hour and thirty minutes (1h30m), when modifying it you must always do it in the allowed formats.
- Time entries will be created in the Billed state when the invoice is saved, the only way to edit them is to edit the invoice.
Rate setting strategy
Maatdesk uses the following strategy to set the Rate field when creating or editing a time entry:
- If the entry is of the type “No Matter”, the Rate cannot be set.
- If the Billing Method of the selected category is Custom Rate or Flat Rate, the rate defined in that category will be applied.
- If the Billing Method of the selected category is Use Default Rate, the rate will be applied according to the following hierarchy:
- If the selected user has (or belongs to a group that has) a custom rate for the selected matter, that rate will be displayed (Matter rate).
- If the selected user has (or belongs to a group that has) a custom rate for the client related to the matter, that rate will be displayed (Client Rate).
Keep in mind that the user takes precedence over the group.
- If the selected user has a rate, that rate will be displayed (User Rate).
- The firm-wide rate will be applied (Firm Rate).
- If none of the above conditions are met, the rate will be zero (0) and must be entered manually.
- If any conditions are met, you can always overwrite the rate if necessary.
Maatdesk timekeepers behavior
Maatdesk offers easy ways to keep track of time through timekeepers located at:
- The top bar.
- My Tasks widget if a time entry is associated with a task.
- Each time entry:
- From the panel to add/edit it.
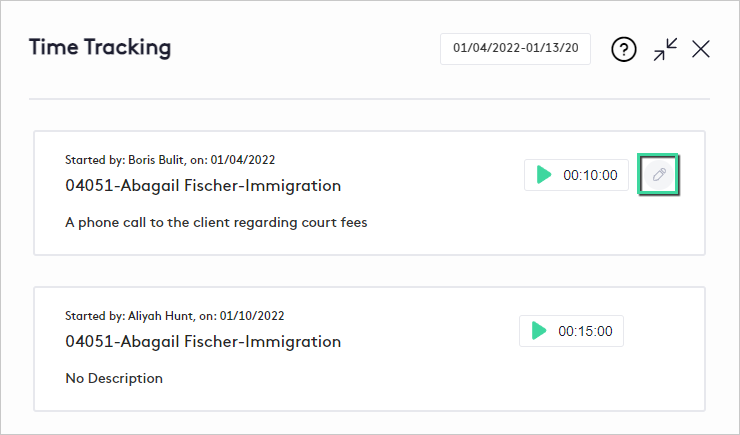
- In the Time Tracking panel, available through the Time Tracking (
 ) button on the top bar.
Generally
Only one timekeeper can be run at a time, so the others will stop when one starts. As long as a timekeeper is running, you can continue using Maatdesk without any inconvenience.
From the top bar:
If the timekeeper starts, a new orphan time entry will be automatically saved. Once stopped, the panel will be displayed to edit said entry, it is recommended to fill in the fields that are shown empty.
An orphan time entry is one that is not of type “No Matter” and does not have an associated matter either.
From a time entry:
Every time a timekeeper starts in some way, so will all the timekeepers for that entry, including the one on the top bar.
Please note that the timekeeper will only start if:
- The time entry is not in the Billed state.
- You are the one who bills the time entry.
Each time a timekeeper stops, the entry automatically updates the Duration and Amount. If there is no associated Matter, the panel to edit the entry will be displayed.
Editing a Time entry
To start editing a time entry, do one of the following:
- In the Activities window or Activities tab of a Matter dashboard, at the beginning of the time entry row in the table, use one of these options:
- Click the Edit () button.
- Click the action selector, and then click the Edit (
 ) button.
- Click the Edit (

- In the Time Tracking () panel, click the Edit (
 ) button to the right of the time entry.
- Create a Quick Bill or access to edit one that contains the time entry to edit.
You can also edit a time entry when:
- The top bar timekeeper starts and then stops directly.
- A timekeeper for a time entry stops and it does not have an associated Matter.
Before editing a time entry, consider the following:
- Read the section Adding a time entry from the Add Time Entry panel to learn how to fill in or change any field.
- Time entries for Closed matters cannot be edited.
- Time entries in Billed status cannot be edited directly, for this the invoices that contain them must be edited. Entries will be updated only when the invoice is saved.
- If the Matter, Activity Category, or User fields change, the Rate will also change according to the strategy defined for this field.
- If you need to change the Duration field, modify the value always keeping the time notation.
Deleting a Time entry
To delete a time entry, do one of the following:
- In the Activities window or the Activities tab of a Matter dashboard:
- Click the action selector next to the Edit () button at the beginning of the time entry row in the table.
- Click the Delete (
 ) button.
- Click the action selector next to the Edit (

- Click the Delete button at the bottom of the Edit Time Entry panel.
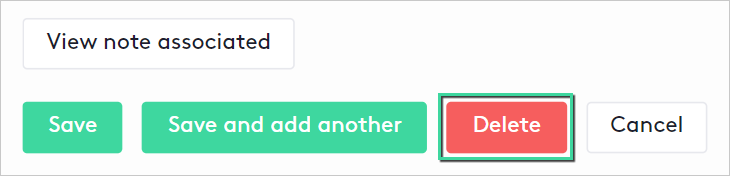
Either way, in the modal shown, click Yes to confirm.
Before trying to delete a time entry, consider the following:
- Time entries can only be deleted if their status is Unbilled or Non-Billable and the matter to which they belong is not Closed.
- If a time entry is removed from a Quick Bill, it will not be deleted from Maatdesk, this action only makes it available for inclusion in another invoice.