Getting started with Billing
In this tutorial, you will learn the basics of Billing so that you can charge clients for the services provided in a very simple way.
Table of contents
Creating a Bill
You can start creating a bill in any of these ways:
- On the Billing tab of the Billing window, click the Add Bill button.

- In the Matters window, click the action selector and then the Add Bill button for any matter.
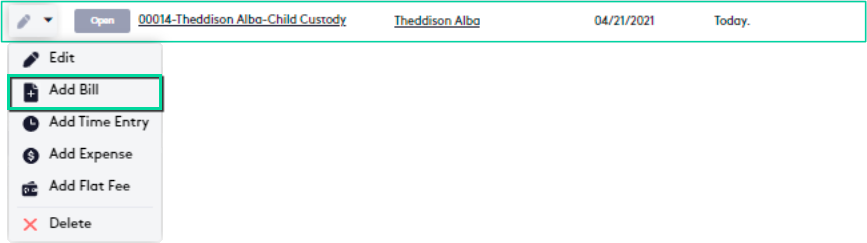
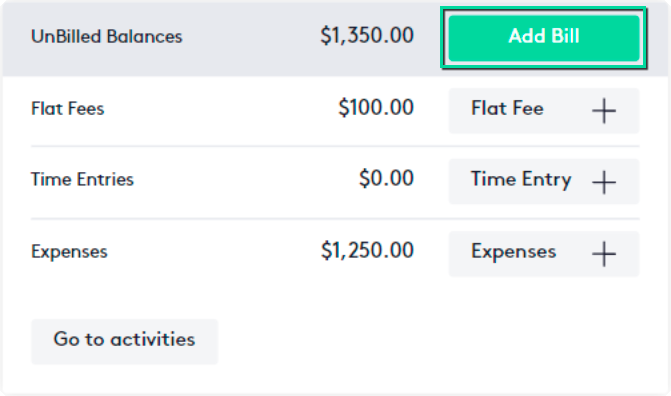
- In the Financial widget of a Matter dashboard, click the Add Bill button.

Invoices cannot be created for Closed matters.
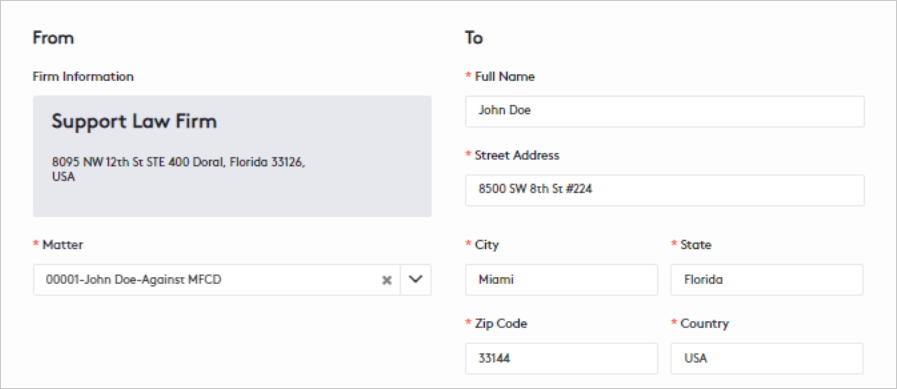
In the New Quick Bill panel, fill in the fields and sections as follows, please note that some fields may already be filled in:
- Matter: Select the matter for which the invoice will be generated.
- To fields (Full Name, Street Address, etc.): After selecting the matter, complete the missing fields or modify the information you consider necessary.
You can also edit the contact before creating the invoice.
Activities section
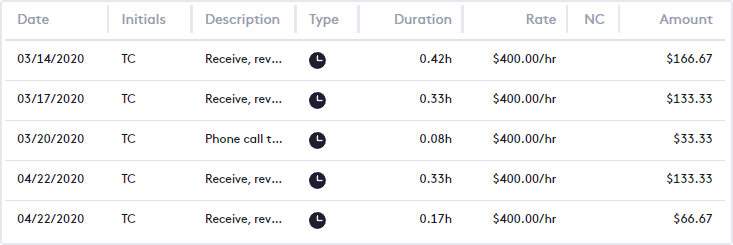
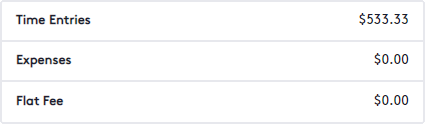
All unbilled activities (time entries, expenses, and flat fees) for the selected matter will be uploaded and organized by activity type, so you can create a single invoice.
While creating the invoice, you will be able to edit or delete any existing activities, you can also add new ones. Here is an explanation of how to perform any of these actions:
Adding activities to the invoice
To create an activity, do the following:
- Click the Add time/expense/flat fee entry button.
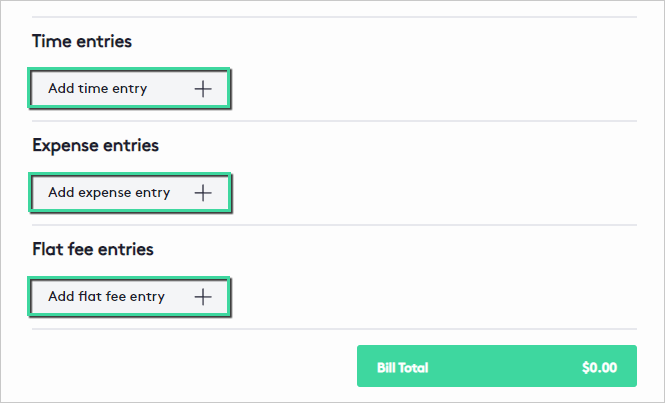
- In the displayed subpanel, fill in or modify the values as needed.
- Click the Save button.

Editing activities on the invoice
To edit an activity, do the following:
- Click the Edit (
 ) button or click the action selector, and then click Edit (
 ).
).
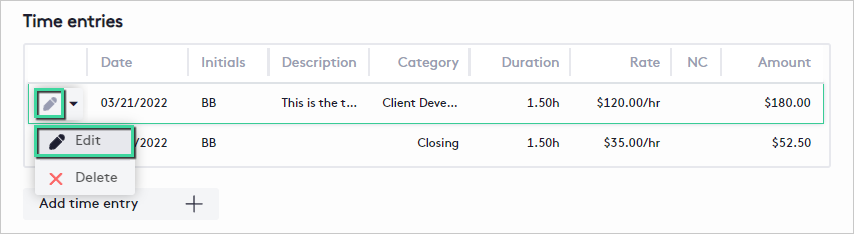
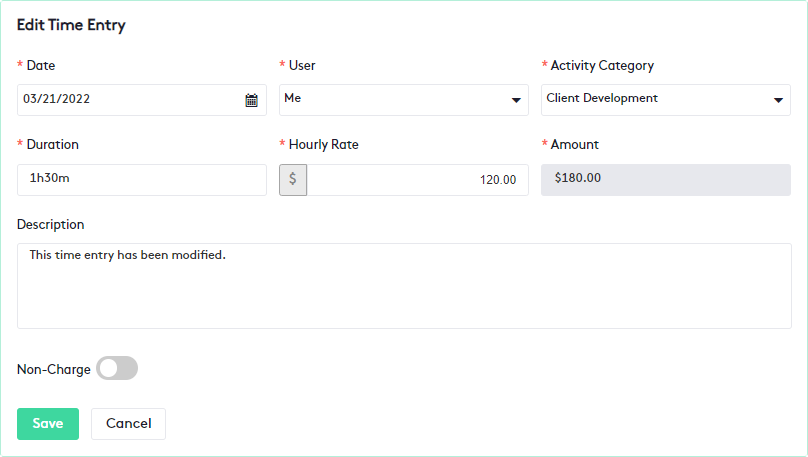
- In the displayed subpanel, modify the values as needed.
- Click the Save button.
To learn how to fill in any field when creating or editing an activity, you can use the following tutorials:
Deleting activities on the invoice
- Click the action selector and then the Delete (
 ) button.

- In the displayed modal, Click Yes to confirm.
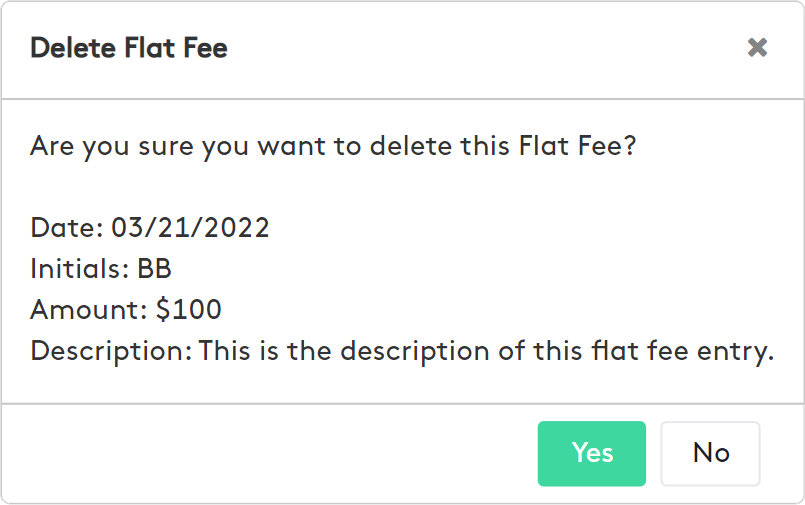
All deleted activities will not be removed from Maatdesk, they will only cease to be part of the invoice to be created and will be available to be included in another.
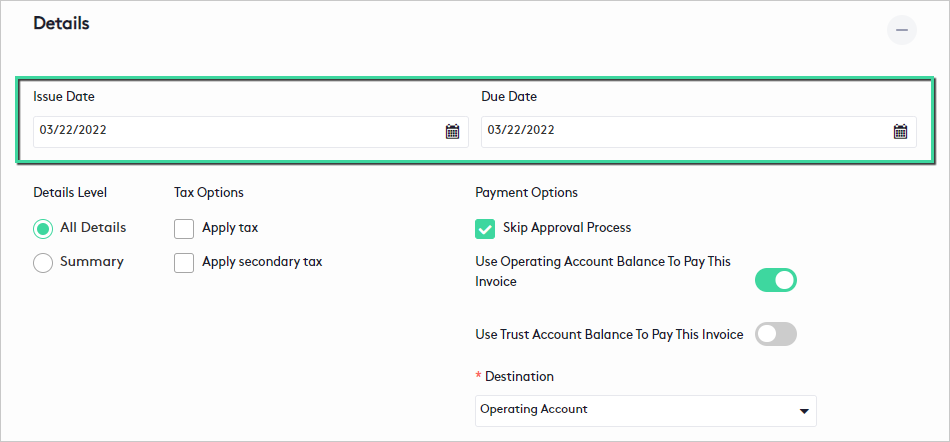
Details section
After setting all the above fields, the final part of creating a bill is setting the additional options in the Details section.
These options are:
- Set the Issue and Due date of the bill.
- Set the Details Level of the bill.
- Set the Tax Options for the bill.
- Configure Payment Options.
Setting the Issue Date and Due Date fields
This subsection defines the invoice issue and due dates:
- The Issue Date will default to the current date and can be changed.
- The Due Date will be according to the grace period established in the contact’s payment profile and can also be modified.
See the following guides or tutorials for more information:
- Getting started with Contacts to know how to establish a client’s payment profile.
- Managing Payment Profiles to know how to create a new payment profile and establish grace periods.
Setting the Details Level
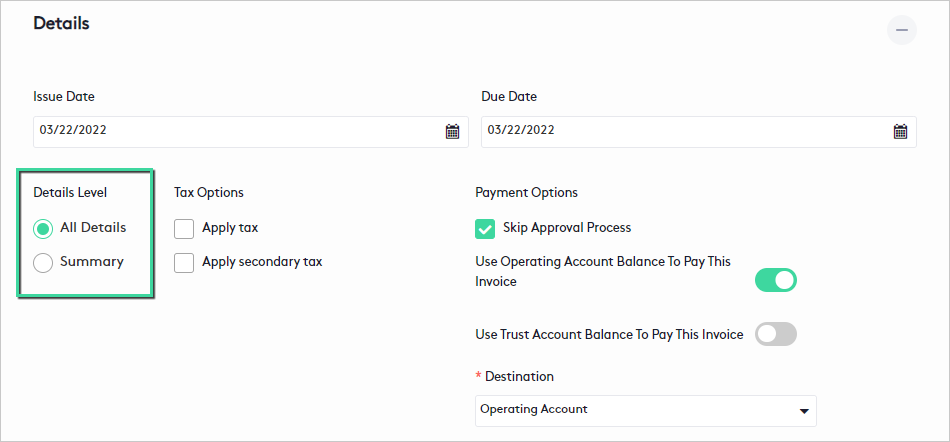
This subsection defines how the activities will be arranged on the invoice, visible in the Billing Details window and the downloaded PDF:
- All Details: This method shows each activity in association with a particular bill as a separate line item.
This billing option is ideal for providing accuracy and transparency to clients with the largest number of bills.
- Summary: This method condenses the activities by type, showing only the types and their amount.
This billing option is suitable to provide clients with a distribution of the amount allocated by type, without losing conciseness and simplicity.
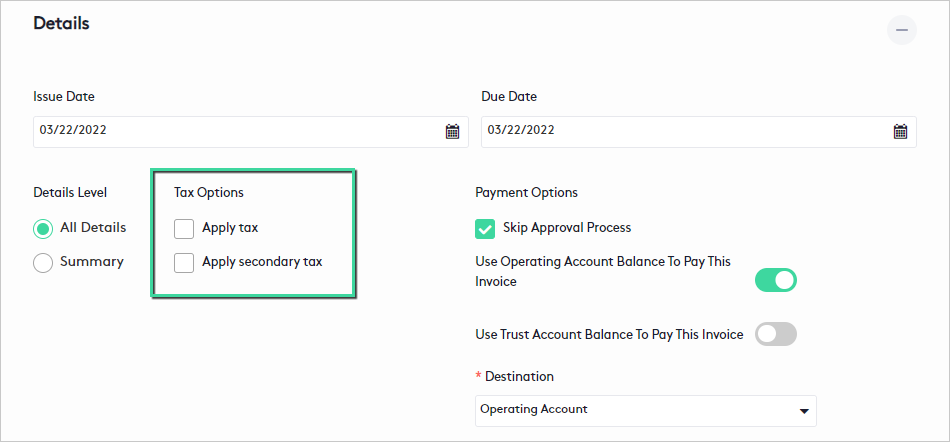
Setting Tax Options
A tax and/or a secondary tax will be applied to the total invoice by checking the respective boxes. Tax rates will be applied according to those established in the Manage Firm settings.
Configuring Payment Options
From this section you can automatically move the bill to Approved status and pay it if funds are available:
- The Skip Approval Process box will be checked by default. By unchecking the box, the invoice will be saved in Draft status.
- To execute the invoice payment, you can select one or both of the available options and then select a Destination (Operating accounts only) where the funds will be deposited.

The order that Maatdesk follows to make the payment of each invoice is shown below:
- Maatdesk will attempt to use Available Matter Funds (for bill-related matters) in Operating Accounts to cover the invoice balance.
- If the balance is not covered, Maatdesk will attempt to use Available Client Funds in Operating Accounts to cover the invoice balance.
- Maatdesk will attempt to use Available Matter Funds (for bill-related matters) in Trust Accounts to cover the invoice balance.
- If the balance is not covered, Maatdesk will attempt to use Available Client Funds in Trust Accounts to cover the invoice balance.
- If each balance is fully or partially covered, Maatdesk will automatically record the payment. The remaining payments (or all if the balance was not covered) must be recorded manually when the client makes them.
Once all the parameters have been configured, click on the Generate Bill button.
To learn how to generate automatic invoices, read the following tutorials:
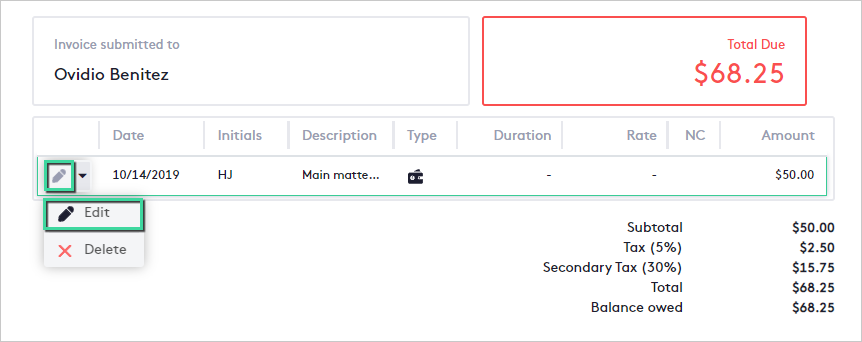
Editing a Bill
You can only edit invoices that are in Draft or Pending Approval for unclosed matters.
To access to edit a bill, you can use any of these ways:
- At the beginning of the bill row in the table, use one of these options:
- Click the Edit () button.
- Click the action selector and then click the Edit () button.
- Click the Edit (

Bills can be located at:
- Billing tab of the Billing window.
- Bills tab of a Matter or Contact dashboard.
- Go to the Billing Details window and click the Edit button.

Access to edit any activity within the invoice, to do this:
- Go to the activity table on the Invoice sheet.
- Click the Edit () button or click the action selector and then click Edit ().
Once the panel is loaded:
- Edit, delete or add any activity or modify the invoice as needed (note that some information cannot be changed).
- You can read the section Creating a Bill to learn about these actions.
- Click the Save Bill button.
Please note that deleting an activity from the Invoice sheet will also modify the invoice.
Activities removed from the bill will not be deleted from Maatdesk, this action will only return them to the Billable Clients tab so they can be included on another invoice.
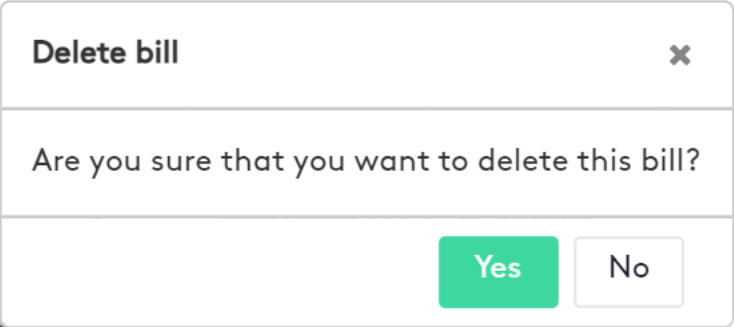
Deleting a Bill
You can only delete invoices that are in Draft for unclosed matters.
To delete a bill:
- Go to the desired invoice.
- Click the action selector at the beginning of the bill row in the table.
- Click the Delete () button.
Bills can be located at:
- Billing tab of the Billing window.
- Bills tab of a Matter or Contact dashboard.

- In the modal that is displayed, click Yes to confirm.
Deleting a bill will not delete the associated activities, they will return to the Billable Clients tab so they can be included on another invoice.