Activities module Overview
Through this guide, you will learn the basics of the Activities window by explaining its main elements and the actions you can take from the Activities and Categories tabs.
Table of contents
Composition of the Activities window
To access the Activities window, simply click the Activities (![]() ) link on the left side panel.
) link on the left side panel.
The Activities window is divided into two tabs:
- Activities tab: This tab allows you to manage each type of activity.
- Categories tab: This tab allows you to manage categories by type of activity and is also divided into three (3) sub-tabs.
Structure of the Activities tab
The main function of the Activities tab is to display all the created activities and filter them by specific conditions or criteria.
The structure of the Activities tab is as follows:
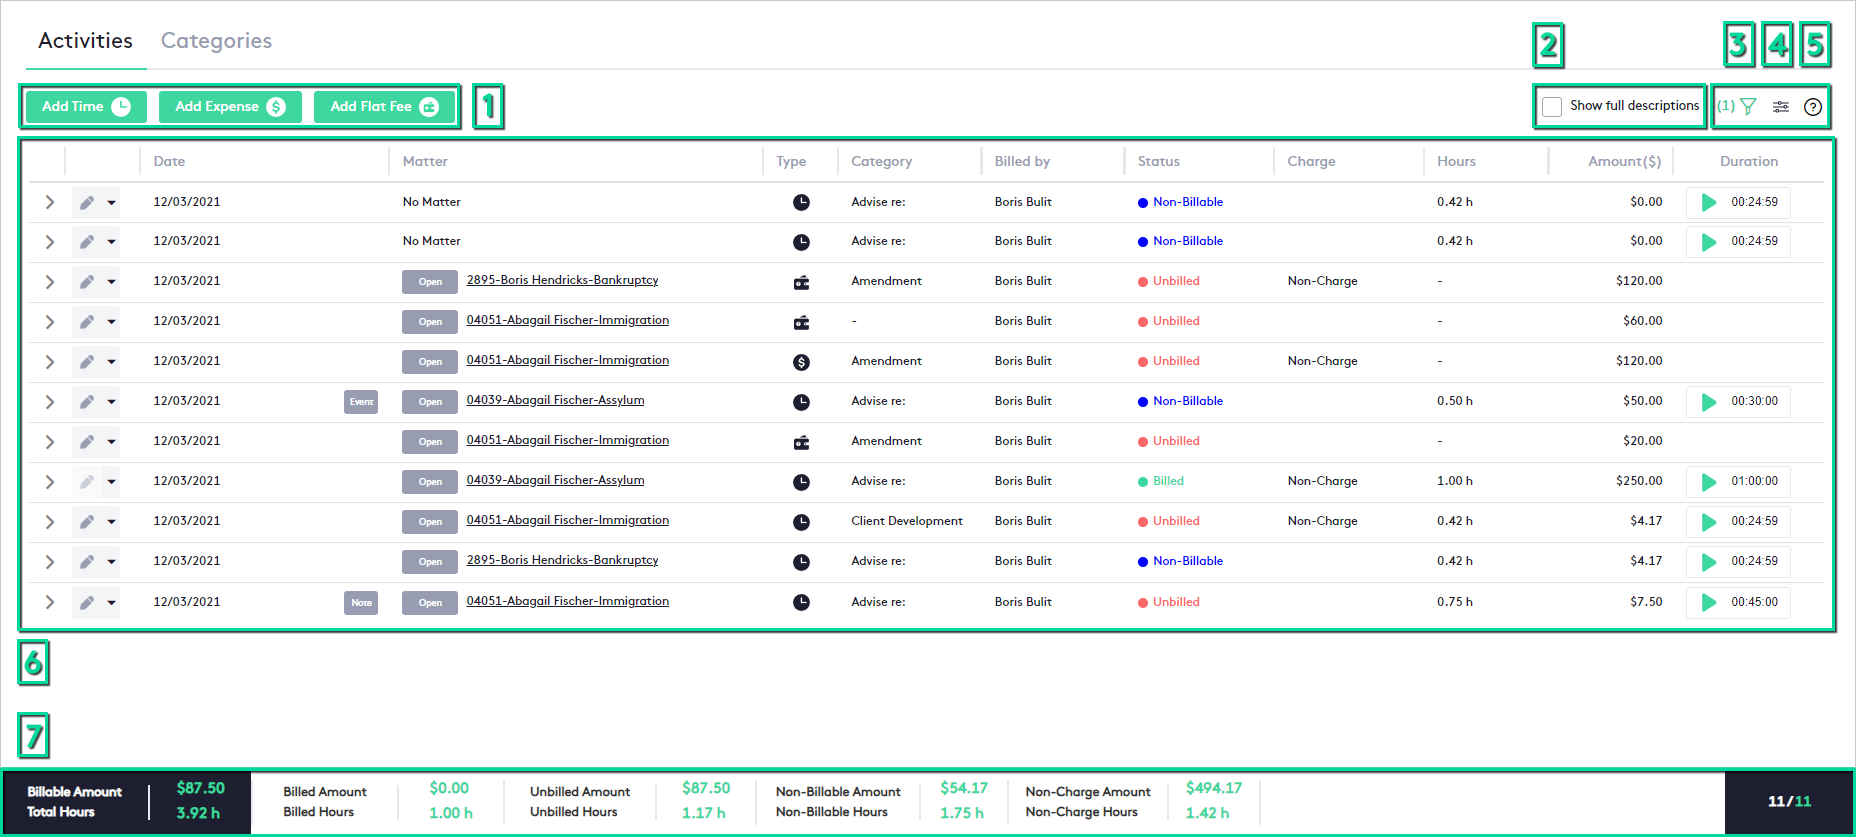
- Add activity buttons: Each button allows you to create the activity indicated by its name.
For more information, read the following tutorials
- Show full descriptions checkbox: This option allows you to expand/collapse all activity descriptions in an additional row below each item in the table.
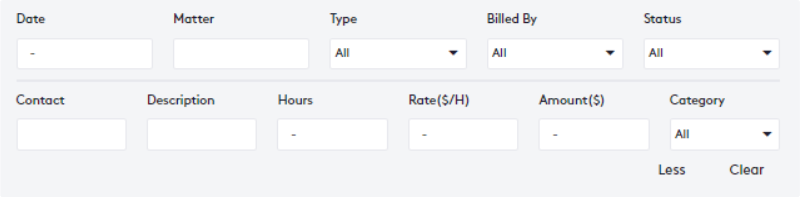
- Filter panel button: This button opens the filter panel to perform advanced searches for activities.
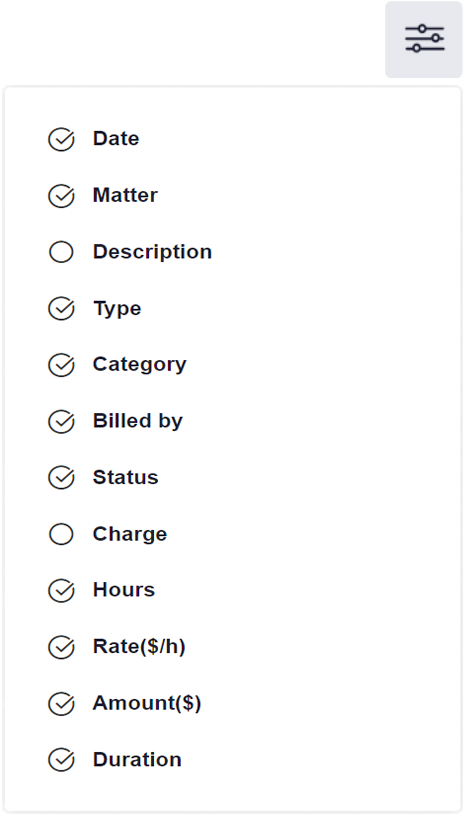
- Column filter: This filter shows all the available columns of the activity table.
Selecting or deselecting a column will show or hide it, the table will always resize automatically.
- Help button: Available throughout Maatdesk, Help buttons provide direct links to the documentation in Maatdesk Support for the window, module, or panel it is in.
- Activities table: This is the main element of the Activities window. It shows all the information of the activities and allows to carry out actions directly on them.
- Summary: Shows total amount, time, and status of activities. Summary will vary depending on the filters applied.
The displayed values are calculated as follows:
- Billable Amount: Sum of Billed and Unbilled amounts.
- Total Hours: Represents total activities hours (productivity) and is Billed + Unbilled + Non-Billable hours.
- Billed Amount: Sum of all Billed amounts (Non-Charge amount = $0).
- Billed Hours: Sum of all Billed hours (including Non-Charge because it is still classified as time).
- Unbilled Amount: Sum of all Unbilled amounts (Non-Charge amount = $0).
- Unbilled Hours: Sum of all Unbilled hours (including Non-Charge because it is still classified as time).
- Non-Billable Amount: Sum of all Non-Billable amounts.
This will represent the total Non-Billable activities associated with matters and activities associated with “No Matter” (Activities associated with “No Matter” = $0).
- Non-Billable Hours: Sum of all Non-Billable hours, it includes Non-Billable activity hours associated with matters and “No matter” activity hours.
- Non-Charge Amount: Sum of the Non-Charge Billed and Unbilled amounts.
- Non-Charge Hours: Only Billed + Unbilled hours.
This summary only includes billable Non-Charge activities, any other status or condition is excepted (e.g., Non-Billable or charged activities).
Keys to better understand Activity summary:
- Orphan time entries (those started but not associated with anything) are not included in any sum.
- Non-Charge will be documented and reflected in reports and invoices with a dollar ($) value to represent how much the firm is awarding to each client but the actual value will be calculated as $0 when summed together. Time for Non-Charge will still reflect the actual time that was spent on activity for tracking purposes.
- Use the Charge column to check for Non-Charge activities.
Structure of the Activity table
The main elements of an activity row in the table are:
- At the beginning of the row, an arrow (
 ) allows you to expand or collapse the activity description in an additional row.
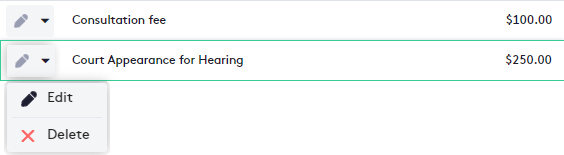
 - Edit button and action selector (
 ): The first element allows you to edit the type of activity, the second will expand a list of options that will be the following:
- Edit (
 ): This button allows you to edit the type of activity.
 - Delete (
 ): Launches a modal to delete the activity.
Note that only activities in the Unbilled and Non-Billable status can be edited or deleted from the table.
- Edit (

Read the following tutorials to learn more about working with activities:
- “Associated” badge: Is available only on time entries and is to the right of the creation date:
- Indicates that the entry has been created associated with a Note (
 ), Task (
 ), or Event (
 ).
). - Clicking on the badge opens the edit panel for the item with which the activity is associated.
- Indicates that the entry has been created associated with a Note (
- Matter status and name: This column shows for which matter the activity was created and its current status. It is also a link to the corresponding Matter dashboard.
- Type of activity: Represents by means of an icon if the activity is a time entry (
 ), an expense (
 ), or a flat fee (
 ).
). - Activity status: Shows the current status of the activity in different colors for better identification (Unbilled, Billed, Non-Billable).
- Timekeeper (Duration): Available only for time entries, it shows the time spent on the activity and allows you to continue counting it.
Read the Getting started with Time entries tutorial to better understand how timekeepers work.
- Rest of activity information: Displays essential information about the activity, such as Description, Amount, or if the activity is non-charged.
Structure of the Categories tab
created for the activities and manage them as needed.
All categories are grouped into three (3) sub-tabs according to the type of activity:
- Time Entry: This tab shows only the categories to assign to time entry activities.
- Expense: This tab shows only the categories to assign to expense activities.
- Flat Fee: This tab shows only the categories to assign to flat fee activities.
Each of the three sub-tabs contains the following elements:
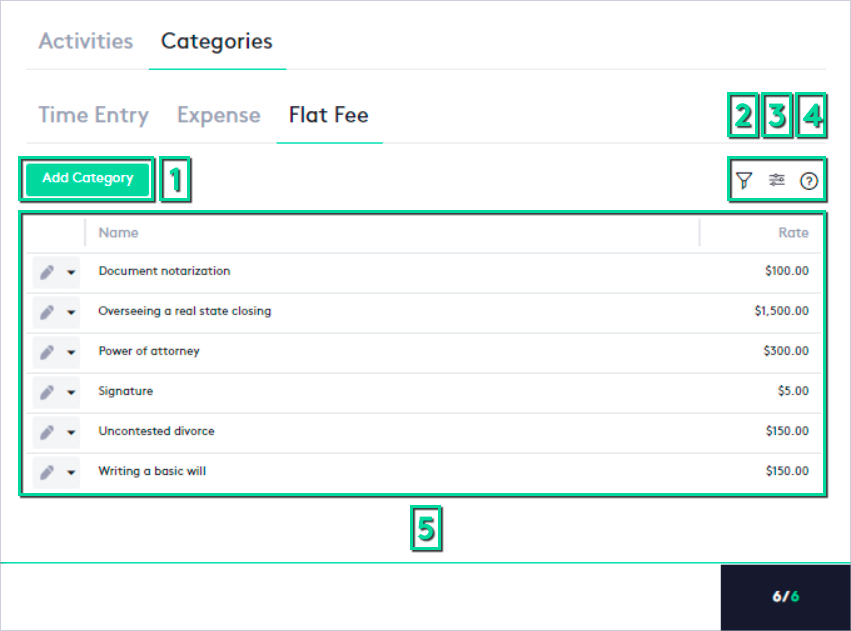
- Add Category button: This button allows you to create a new category according to the type of activity.
- Filter panel button: This button opens the filter panel to search for a category.
- Column filter: This filter shows all the columns available in the category table.
Selecting or deselecting a column will show or hide it, the table will always resize automatically.

- Help button: Available throughout Maatdesk, Help buttons provide direct links to the documentation in Maatdesk Support for the window, module, or panel it is in.
- Category table: Shows all categories according to the type of activity selected.
At the beginning of the category row, you will find the following buttons:
- Edit (
 ): This button allows you to edit the category.
 - Action selector (
 ): Expands the following list of options:
 - Edit (): This button allows you to edit the category.
- Delete (): Launches a modal to delete the category.
- Edit (
Read the How to work with Activity categories guide to learn how to manage your categories.