Managing Payment Plans
The Payment Plan tool allows you to manage invoice installments, controlling when and how much the client must pay in a given period. Through this guide, you will learn how to manage payment plans for bills and requests.
All the actions described in this guide will be done after the creation of an invoice.
Table of contents
Ways to create a payment plan
In Maatdesk there are two different ways to create a payment plan:
From a matter
A payment plan can be created directly when creating or editing a matter if it is billable.
The Create Payment Plan button will be available if:
- The billing method is “Hours” and a request is created.
- An amount must be defined for the request.
- If an Initial Payment is created, the payment amount must be less than the amount defined for the request.
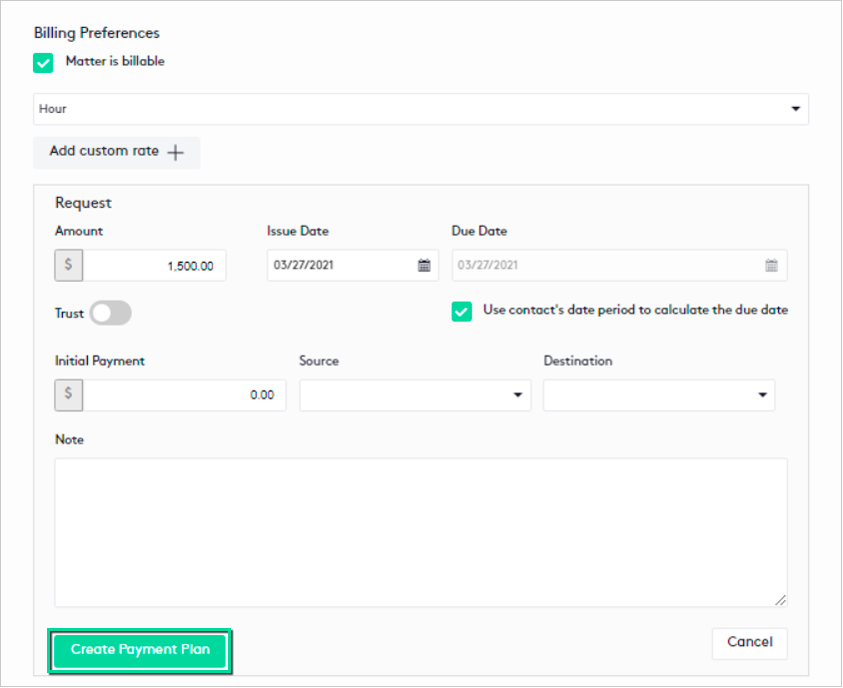
- The billing method is “Flat Fee” and the Amount field is filled in for the invoice that will be created.
- If an Initial Payment is created, the payment amount must be less than the amount defined for the Flat Fee activity.

To learn how to work with matters, read the tutorial Getting started with Matters.
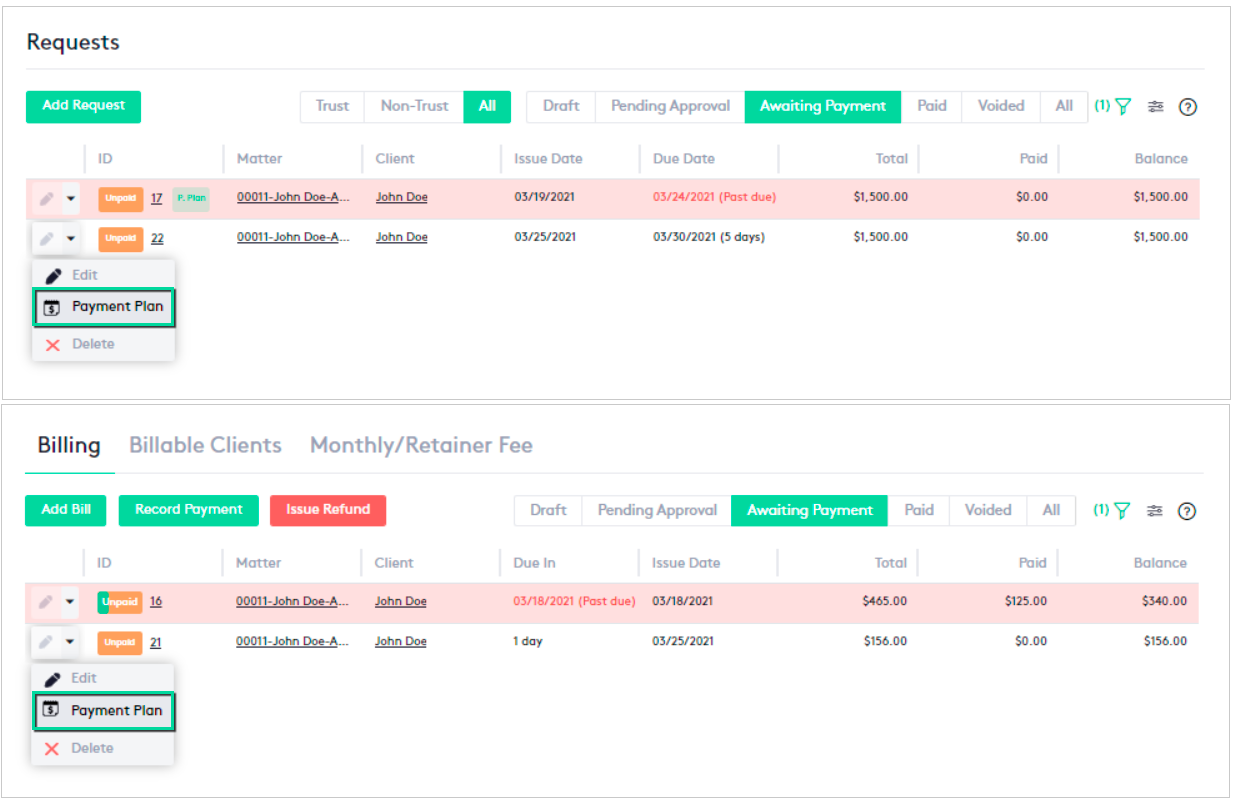
From a bill or request
To create a payment plan for an invoice or request:
- Go to the bill/request table.
- Click the action selector next to the Edit (
 ) button, at the beginning of the invoice row in the table.
 - Click the Payment Plan (
 ) button.
Payment plans can only be created if the invoice is in the Approved state.
Creating a Payment Plan
When creating a payment plan directly from a bill or request, in the Create Payment Plan panel you will see two information blocks:
- Invoice/request number and related matter.
- Current balance (amount) of bill/request and related client.

Both from the Create Payment Plan panel and from the Add or Edit Matter panels, the procedure to follow from now on will be the same:
There are two variants to create a payment plan:
- The Generate installments button to create installments automatically. This is a mechanism offered by Maatdesk to set the installments amounts equally.
- The Add installment button to create the installments manually.
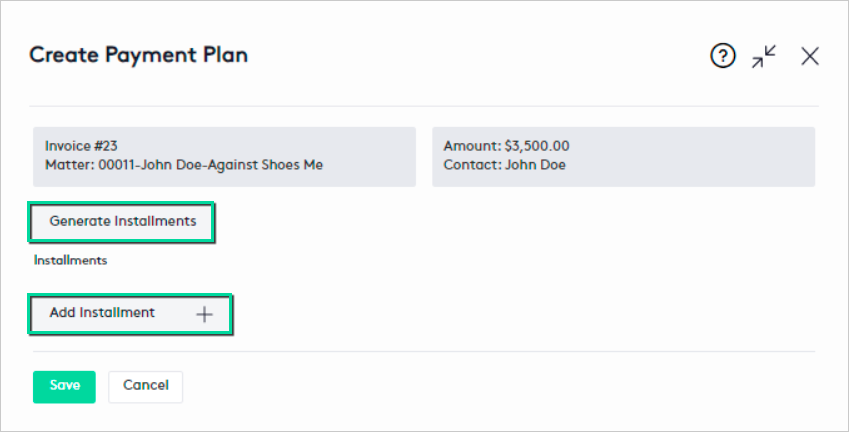
The two ways to create installments for a payment plan are explained below:
Create installments automatically
- Click the Generate installments button.
- Insert a down payment if the client makes a payment on the spot.
- Set how many payments and how often the client will pay the installments.
- The first due date
will adjust to the frequency set above (e.g.: if you selected Weekly, the first due date will be next
week).
- You can change it if necessary.
- As of this date, the installments will be generated based on the information provided previously.
- Click the Apply button.

Once the installments have been generated:
- You can create new installments.
- If a down payment was made, this will be the first installment that will appear, with the current date and the amount that was established.
- If you create or modify an installment, the amount of the payment plan cannot exceed the amount of the invoice.
It is not recommended to modify the automatically generated installments unless you know in advance the payment dates and the amounts to apply.
Finally, just click the Save button to create the payment plan.
Insert a down payment if the client makes a payment on the spot.
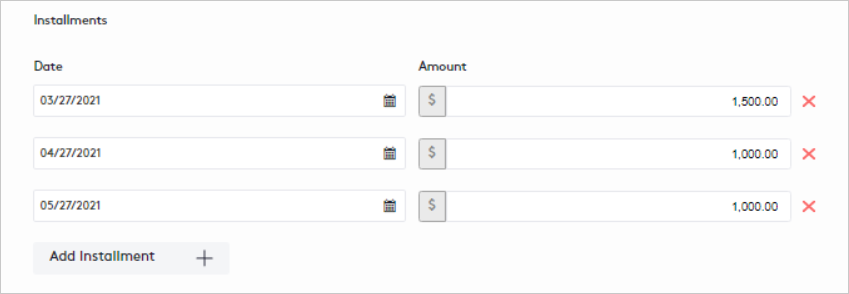
Create installments manually
You can create as many installments as you need by clicking the Add installment button each time, even if you previously generated some automatically.
For each installment created, fill in the fields as follow:
- Date: Select the date the client must pay the installment.
- Amount: Enter the amount of the installment.
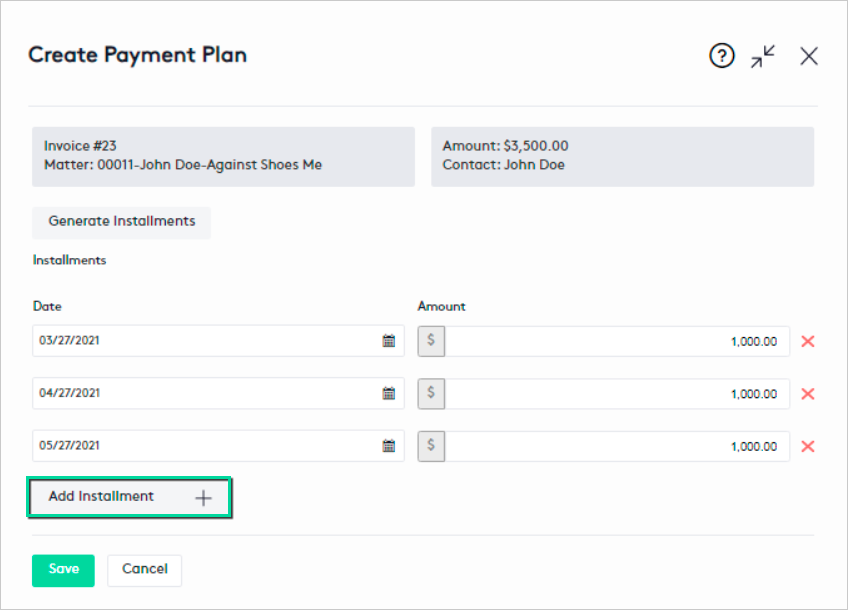
After finishing, click the Save button to create the payment plan.
Please note the following items:
- The sum of the installment amounts cannot exceed the invoice amount.
- This option requires that you previously know the payment dates and the amounts to apply to effectively create the payment plan.
Create an installment if the client makes a payment on the spot.
Either way, after creating the payment plan:
- Installments will be displayed in the Installments section of the Invoice Details or Request Details window, only for those in the Approved status.
If payments have already been made, some installments may have already been met, so they will appear in the Done status.
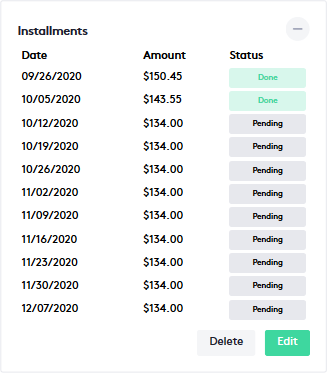
- Installment payment events will be created in the Payment Plan calendar, according to the date of each installment, including the down payment if it was made.

When creating a payment plan, the payments associated with the plan installments will not be created. On the scheduled date, a system user must record the payment corresponding to the installment provided in the payment plan to process the transaction.
A payment plan is an informative tool, it only offers information to the user about the installments that must be paid in a certain period, and creates events that inform the user when a client must pay a certain installment.
Editing a Payment Plan
Before editing a payment plan, note that it can only be done on bills or requests in Approved status.
To edit a payment plan, you must first do one of the following:
First way:

Second way:
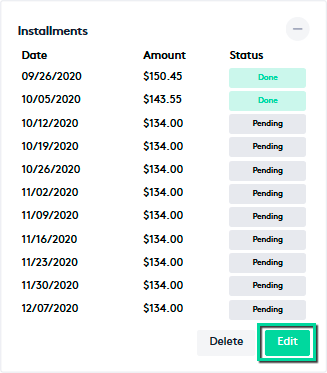
- Access the Invoice Details or Request Details window of the invoice containing the payment plan.
- Go to the Installments section.
- Click the Edit button located below the installments.
Third way:
- Go to the Schedules window.
- Click on any event of the payment plan to edit.
- After the modal is displayed, click the Edit (
 ) button.

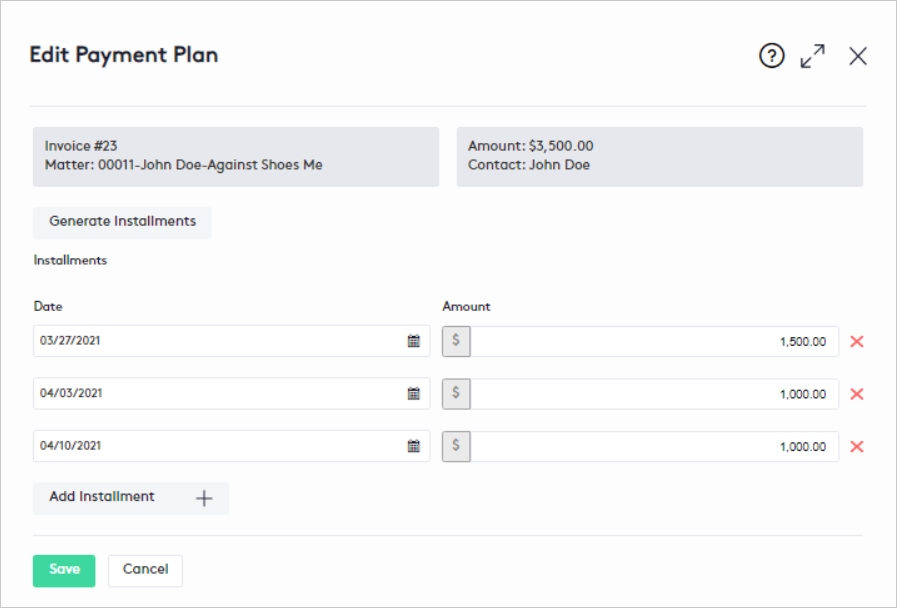
Once the Edit Payment Plan panel is displayed, edit the information as needed. To help yourself, you can follow the steps in Creating a payment plan.
After modifying and verifying the information provided, click the Save button.
When clicking the Generate Installments button, the existing installments will be removed to add the new ones.
Once the payment plan is updated:
- Installments will be updated in the Installments section of the Invoice Details or Request Details windows, only for those in the Approved status. .
If payments have already been made, some installments may have already been met, so they will appear in the Done status.
- Installment payment events will be updated in the Payment Plan calendar, according to the date of each installment, including the down payment if it was made.
When editing a payment plan, the payments associated with the plan installments will not be updated. On the scheduled date, a system user must record the payment corresponding to the installment provided in the payment plan to process the transaction.
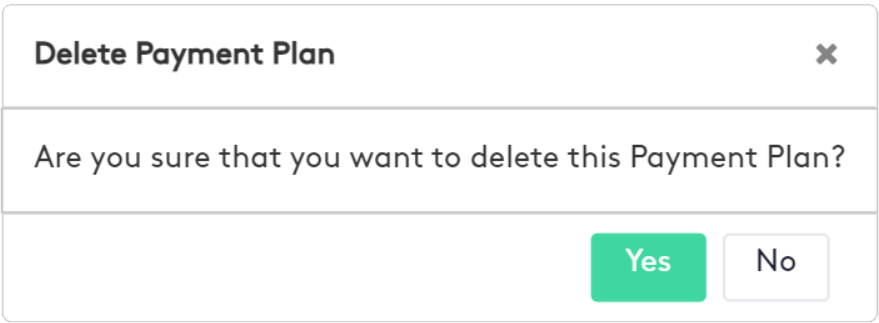
Deleting a Payment Plan
Before deleting a payment plan, note that it can only be done on bills or requests in Approved status.
To perform this action:
- Access the Invoice Details or Request Details window of the invoice containing the payment plan.
- Go to the Installments section.
- Click the Delete button located below the installments.

- After the Delete Payment Plan modal opens, click the Delete button.
Once a payment plan is deleted, the installment payment events will also be deleted.
When a payment plan is deleted, the payments associated with that plan’s installments will not be deleted. To do this, a system user must delete the payments.