Schedules module Overview
In this guide, you will understand how the Schedules window works while learning how to interact with all of its elements.
Table of contents
Structure of the Schedules window
The Schedules module is responsible for managing all your events, invitations and calendars, whether personal, from Maatdesk or Google that you have integrated or that other users have shared with you. The window will have the following composition:
- Window toolbar: From the window toolbar you can interact with the following elements:

- Today button: Provides direct access to the current date if you are in or browsing for a period other than the current day/week/month.
- Previous (
 ) and Next (
 ) arrows: Allow you to move between days, weeks, or months on the calendar.
 - Refresh (
 ) button: This button allows you to refresh the Schedules window manually, if your Internet connection is slow, automatic window refresh may not be available.
 - Owner checkbox: This option shows/hides the name of the event owners.
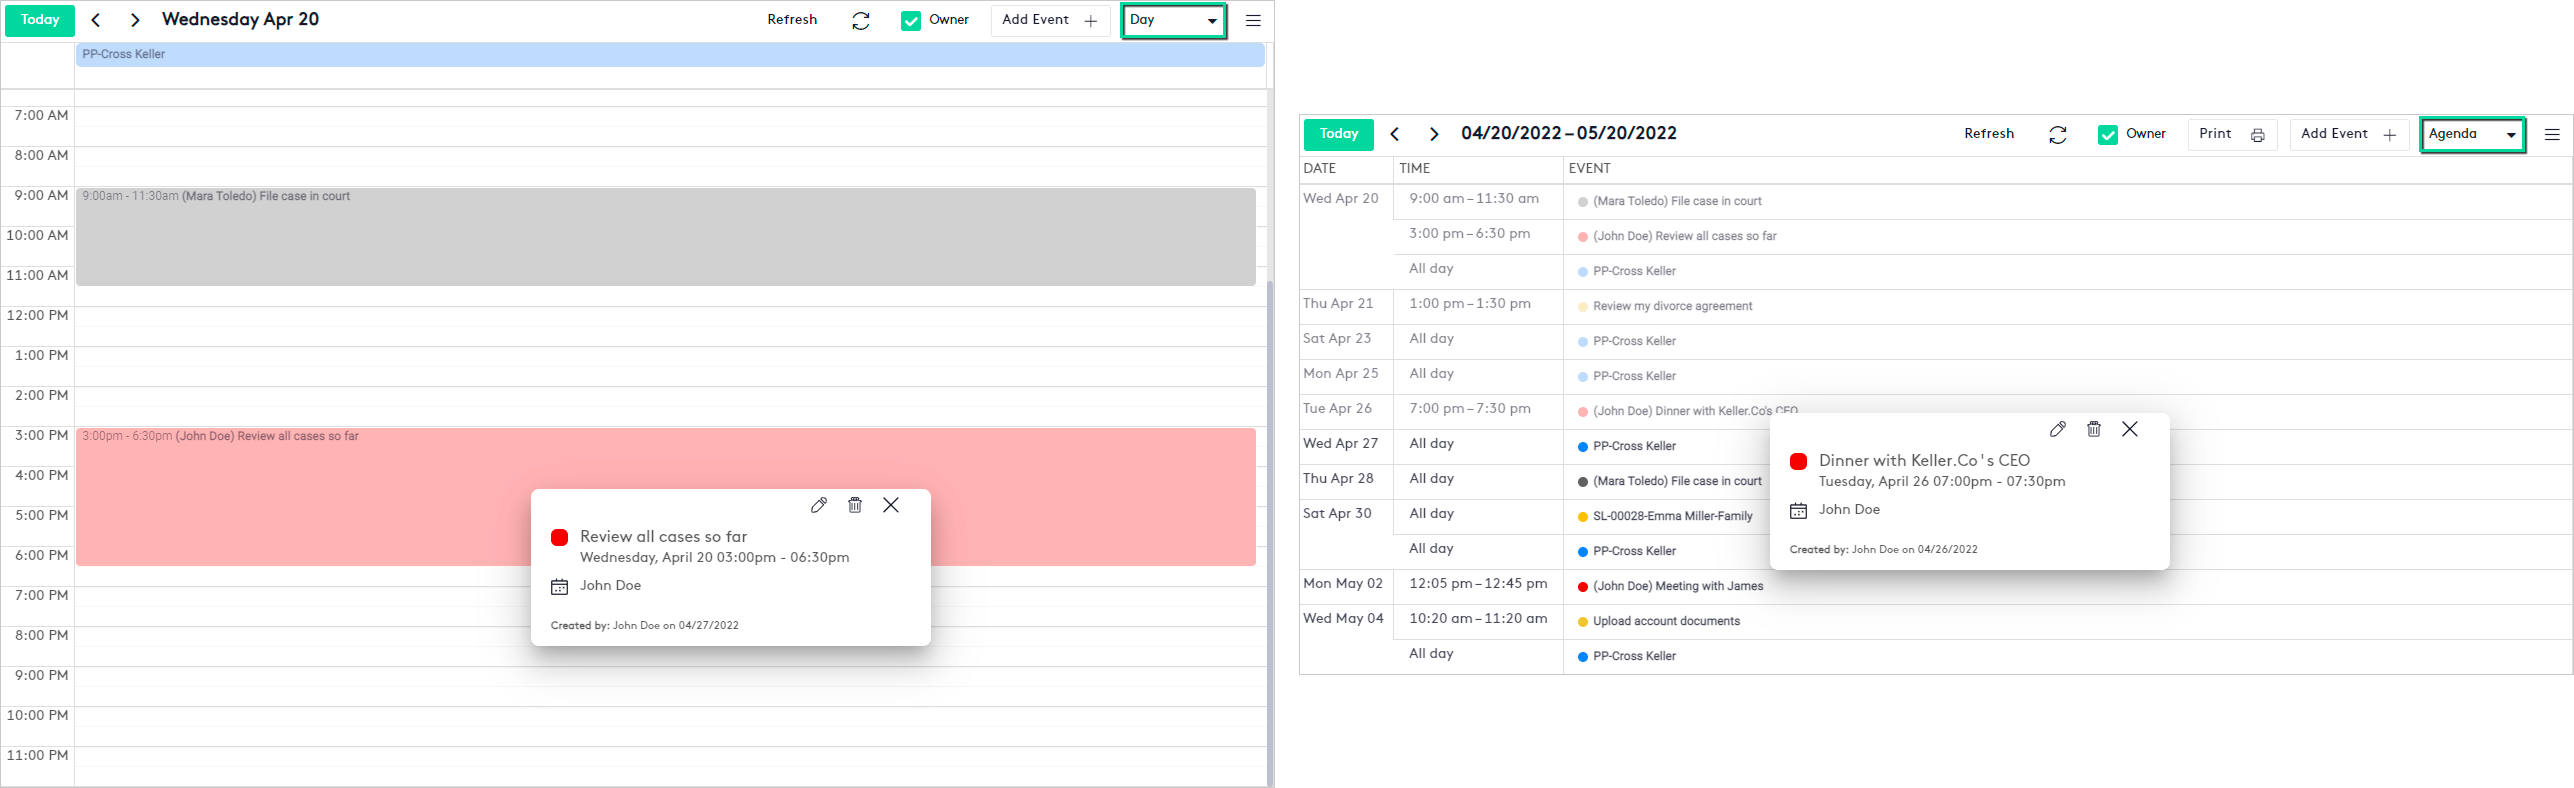
- Print (
 ) button: When Agenda view is selected, this button is available to print the schedule for the selected period.
 - Add Event button: This button allows you to create a new event.
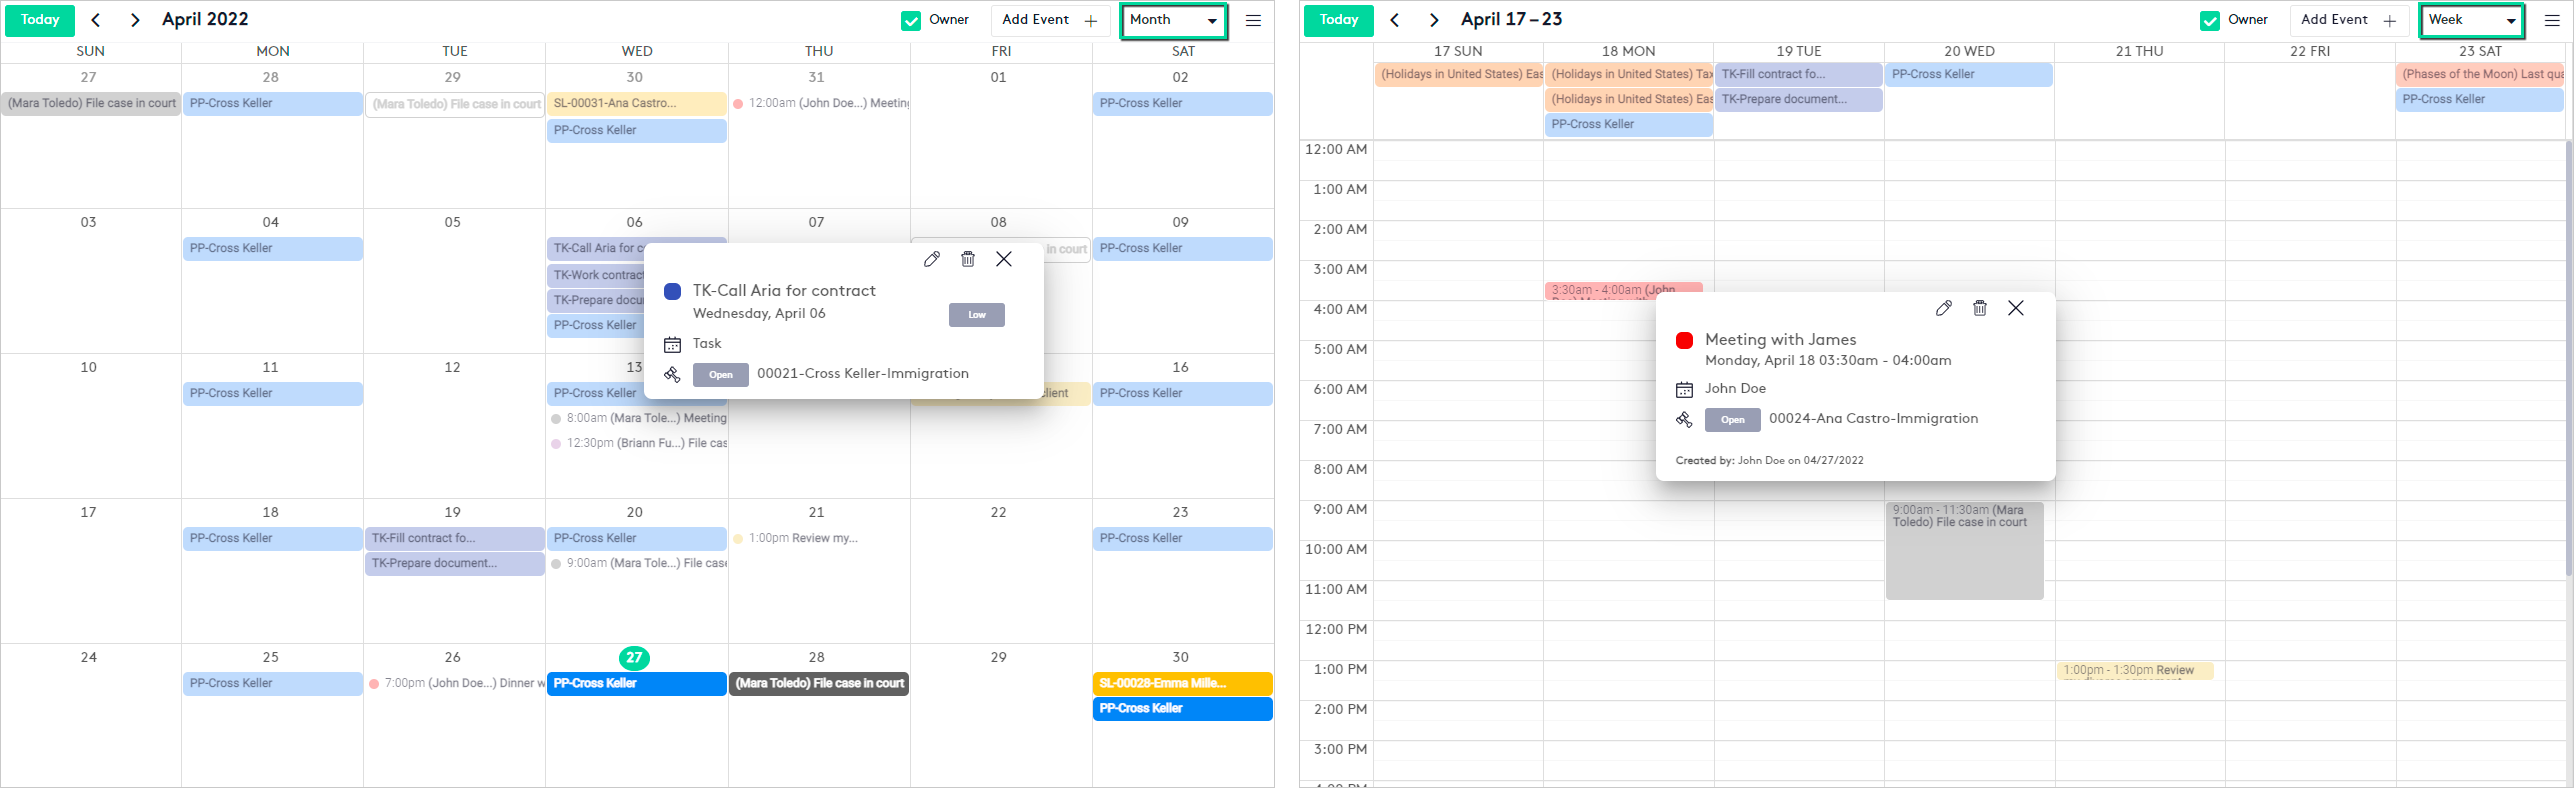
- Layout selector: This selector allows to change the display mode of the main block of the window.
- Expand/Collapse(
 ) button: This button shows the right-side panel (Calendars); otherwise, it returns the main block to its normal size to give you more space if you need it.

When the right-side panel is hidden, an Add(
) button will be displayed at the bottom right of the window to directly create a new calendar.
- Main block of the Schedules window: The main block will show the calendars and their events in the display mode (Month/Week/Day/Agenda) you select and will always display the last changes you have made in the module or in any other Maatdesk module that is directly related to it (e.g., when you create a Payment Plan or a Task is edited).
Actions that will help you work better in this block:
- Except in the Agenda view, you can click or drag on any day/time to create an event in that period, so you don’t have to select or adjust the time later.
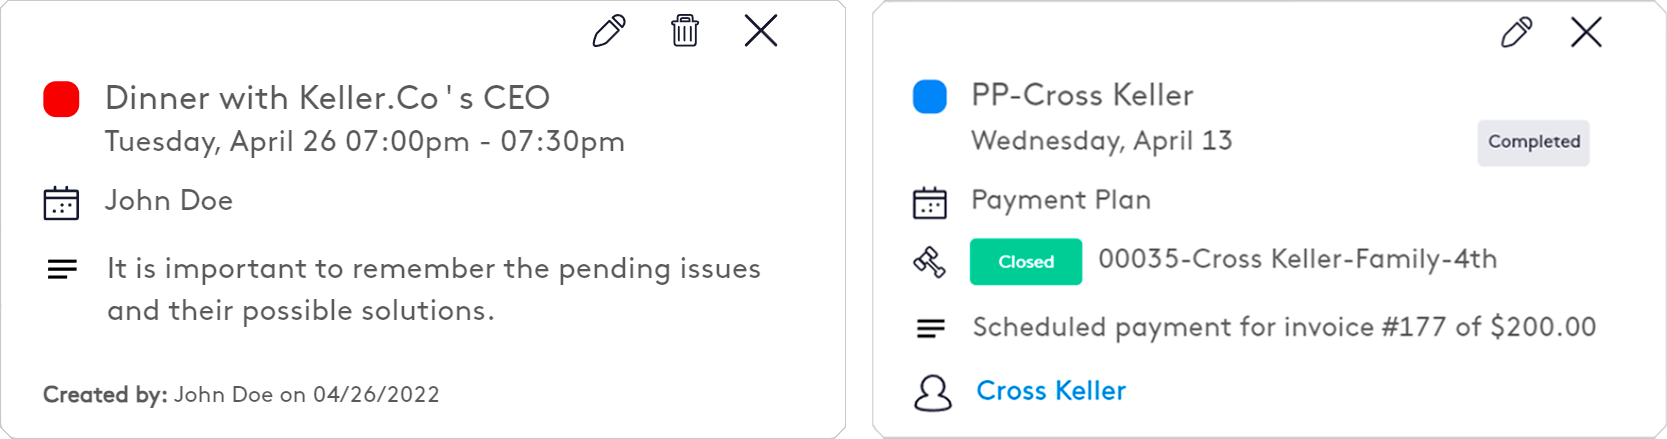
- By clicking on an event, you will be able to see a card with all its details and edit or delete them when the action is allowed.
It is recommended that you read the Getting started with Events tutorial to learn how to manage your events and invitations.
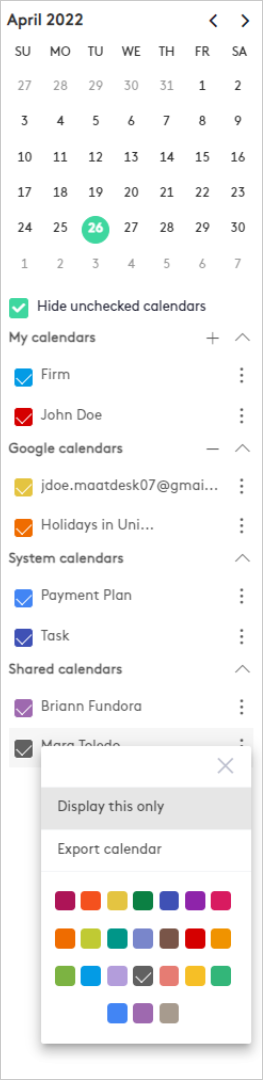
- Right-side panel (Calendars): This panel consists of two main elements:
- Monthly calendar: This calendar allows you to scroll through the months to select the day you want to see scheduled events.
- User calendars: This block shows the available calendars to the user, which will be divided into four (4) categories or sections:
- My calendars: These will be your default calendars and any calendars you create.
- System calendars: These are the Maatdesk calendars that are associated with other modules.
- Google calendars: These are the calendars of a Google account that you integrate.
- Shared calendars: These are the calendars that other users have shared with you to view or manage their events.
Actions that will help you work better in this block:
- Below the monthly calendar, you will find a button to hide/show those calendars that you have unchecked. Note that this action will not be for calendar events, only the calendar itself.
- Click the Options button to the right of a calendar to perform actions on it, such as export it or change its color, but note that this depends on the type of calendar or the permissions granted.
You can find a better understanding of working with calendars in the Getting started with Calendars tutorial.