Contacts module Overview
Through this guide, you will learn the basics of the Contacts window, an explanation of its main elements, and what actions you can perform from this window.
Table of contents
Composition of the Contacts window
To access the Contacts window, simply click the Contacts (![]() ) link on the left side panel.
) link on the left side panel.
From the window, you will be able to create new contacts and manage both the people and the companies that have been added to the firm, whether they are clients or not.
The structure of the Contacts window is as follows:
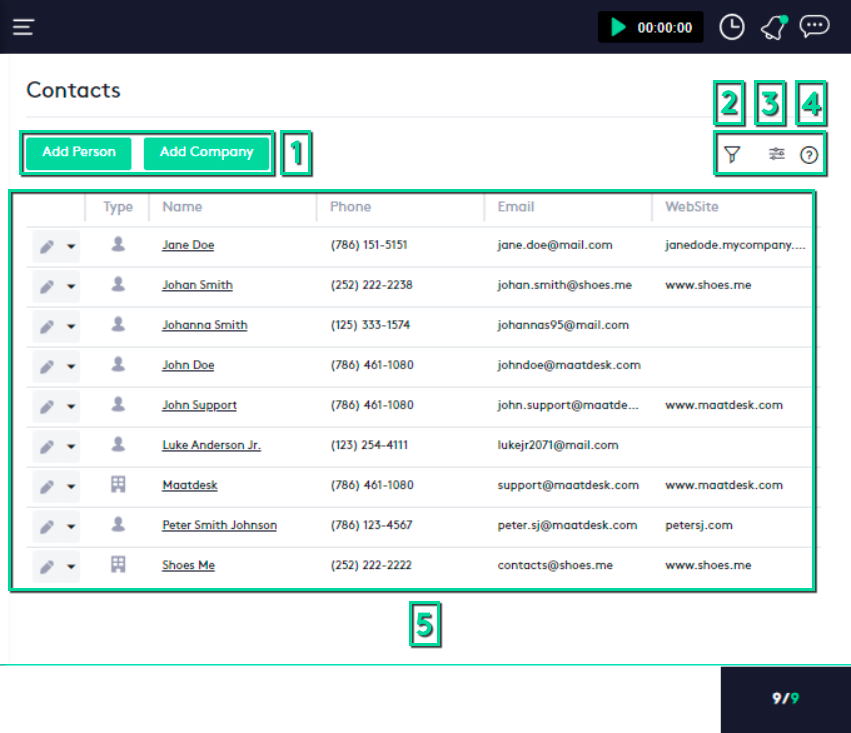
- Action buttons: These buttons launch a panel to perform the action indicated by its name.
- Add Person: Allows the creation of a new person contact.
- Add Company: Allows the creation of a new company contact.
You can find more information about these actions in the Getting started with Contacts tutorial.
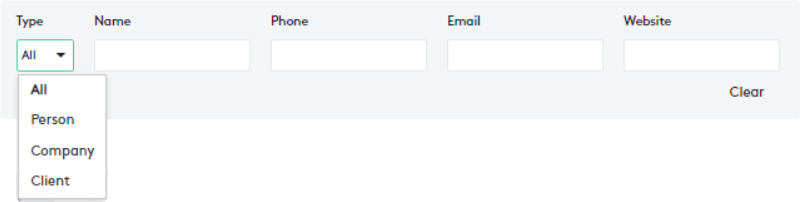
- Filter panel button: This button opens the filter panel to selectively search through contacts.
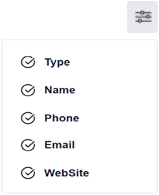
- Column filter: This filter shows all the available columns of the contact table.
Selecting or deselecting a column will show or hide it, the table will always resize automatically.
- Help button: Available throughout Maatdesk, Help buttons provide direct links to the documentation in Maatdesk Support for the window, module or panel it is in.
- Table with all contacts: This is the main element of the Contacts window.
It shows the existing contacts based on the applied filters, their main information, and also allows you to perform actions directly on them.
Structure of the Contact table
The main elements of a contact row in the table are as follows:
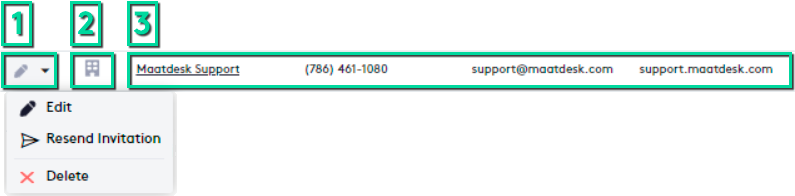
- Edit button and action selector (
 ): The first item allows you to edit the contact, the second will expand a list of options that will be the following :
- Edit (
 ): Allows you to edit the contact.
 - Resend Invitation (
 ): If a Client Portal has been enabled for the contact, this button allows you to resend an invitation if for some reason a previous one has not been accepted.
 - Delete (
 ): Launches a modal to delete the contact.
You can find more information about these actions and how to perform them in the Getting Started with Contacts tutorial.
- Edit (
- Type: Represents in an icon if the contact is a person (
 ) or a company (
 ).
). - Contact information: Displays the primary details of the contact.
The rest of the information can be seen by accessing to edit the contact.
The name of the contact is a link that will redirect you to the corresponding Contact Dashboard, where you can view and manage all the elements directly associated with the client.