Managing Practice Areas
In this guide, you will learn how to manage custom forms for each practice area to extend Matter Forms, so custom fields will be part of the data required to fill in the matter information.
It is recommended, but not required, that:
- As a prerequisite, you have defined the layout of the form and the data to be captured.
- You follow all the steps and the order described in the guide to optimize your time and be able to create a well-structured form.
Table of contents
- Accessing the Practice Areas tab
- First steps when creating custom forms
- Creating the custom blocks
- Creating the rows
- Creating the custom inputs
- Arranging items
- Editing items
- Deleting items
- Last steps when creating custom forms
Accessing the Practice Areas tab
To access the Practice Areas tab:
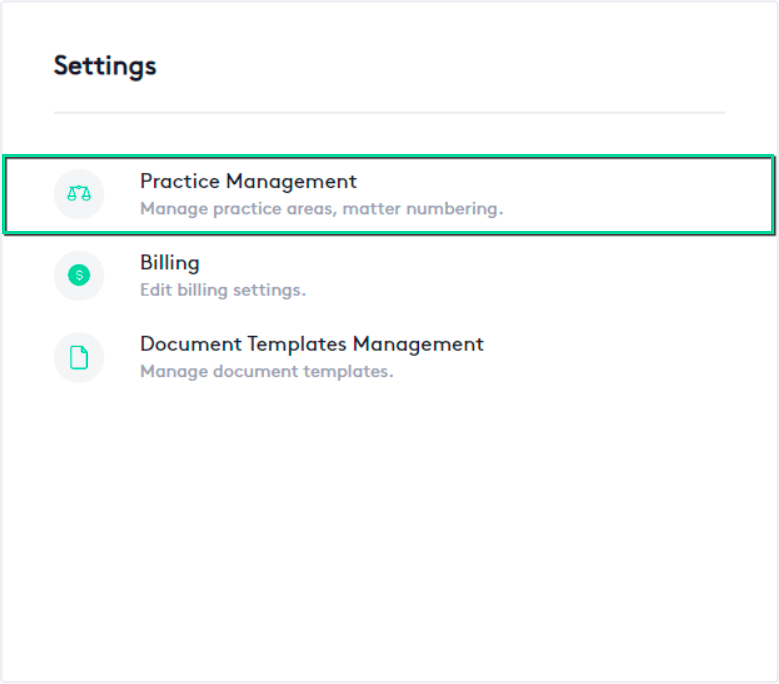
- Click the Settings (
 ) link on the left side panel.
 - Click on the Practice Management block.
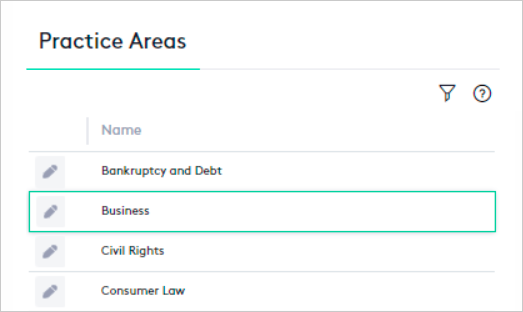
Once on the tab, you can access all the practice areas that Maatdesk will include by default when creating a tenant to manage custom forms for each of them.
First steps when creating custom forms
To start creating a custom form:
- Click the Edit (
 ) button at the beginning of the practice area row.

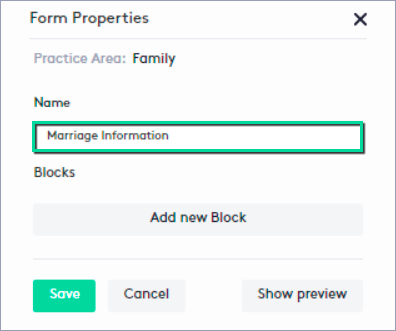
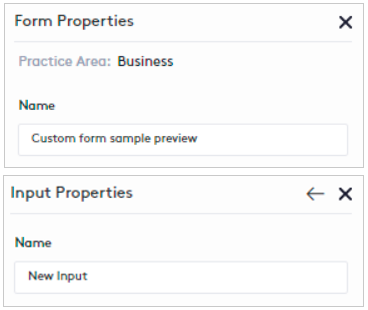
- Enter the name of the form from the Form Properties panel.
Before creating a custom block, you should know that in any form the structure will be the following:
- Block: It is a container that divides the elements to represent by sections.
- Row: Each block will have one or more rows and each of them will contain up to four inputs covering 100% of the width of the block.
- Input: It will be each field of the form and where the data will be inserted for later saving.
The following image shows an example of the scheme to follow when creating a custom form:
It is recommended that you read these basic concepts that will help you during the development of this guide:
- Practice areas cannot be created or deleted and editing them only allows you to manage the forms to be customized.
- Before creating a custom form, you should first have established its structure to gain clarity and time.
- On the right side of the forms, you will find the panels that allow you to manage the elements: Form, Block, Row, and Input Properties.
- The Back (
 ) arrow allows you to return to the parent element of the current one.
- Clicking on an element directly in the layout window will allow access to its Properties panel, note that the entire window is a representation of the form.
- Click the Show preview button at any time to see what the custom form will look like in the Matter Form panel.

Creating the custom blocks
To create the first custom block, use one of these options:
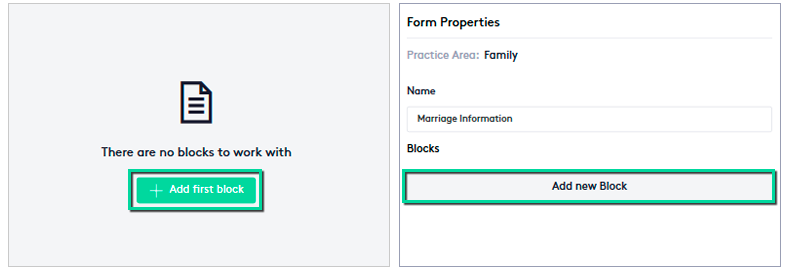
- Click the Add first block button in the center of the window.
- In Form Properties, click the Add new Block button.
To create the remaining blocks:
- In Form Properties, click the Add new Block button as many times as necessary.
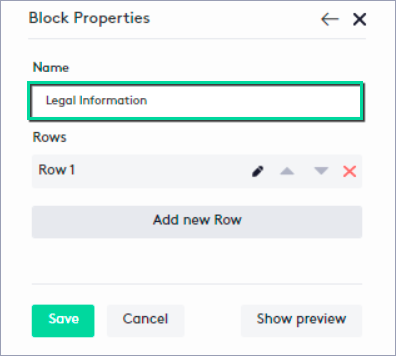
Each block must have a name, so repeat this process for each of them:
- In Form Properties, click the Edit () button for the block.
You can also click directly on the block in the layout window.
- Enter the Name of the block.
- Click Back () to return to Form Properties.
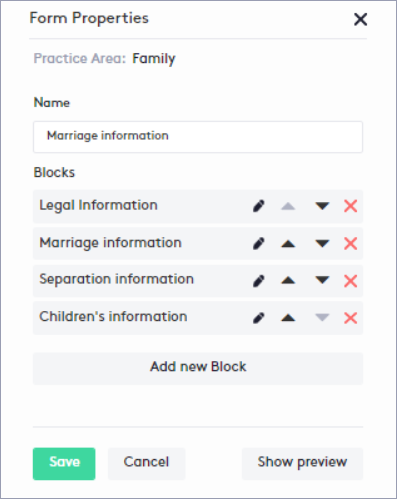
After creating the blocks and changing their names, they should finally look like this:
Creating the rows
After any block is created, it will contain a single row by default.
To create the rows, in each block repeat this process:
- In Form Properties, click the Edit () button for the block.
You can also click directly on the block in the layout window.
- Click the Add new Row button as many times as necessary.
- Click Back () to return to Form Properties.
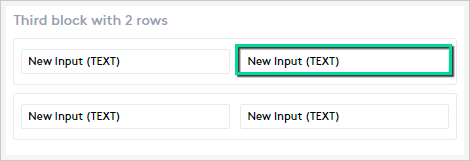
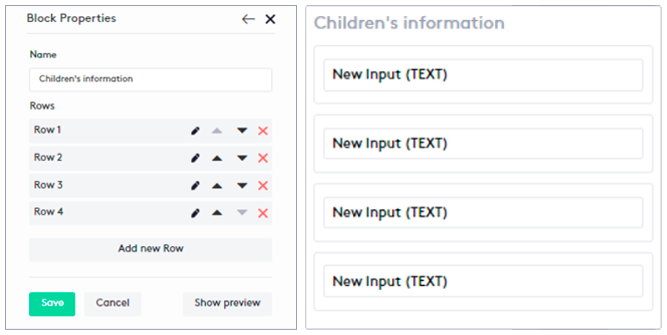
The “Children’s Information” block should look like this:
Creating the custom inputs
After creating any block or row, it will contain a single text input by default.
To create all the inputs, in each row repeat this process:
- In Block Properties, click the Edit () button for the row.
You can also click directly on the row in the layout window.
- Click the Add new Input button, up to four times, as many times as necessary.
- Click Back () to return to Block Properties.
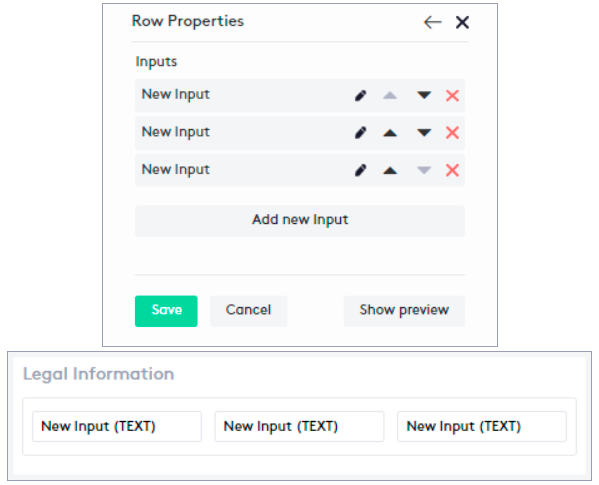
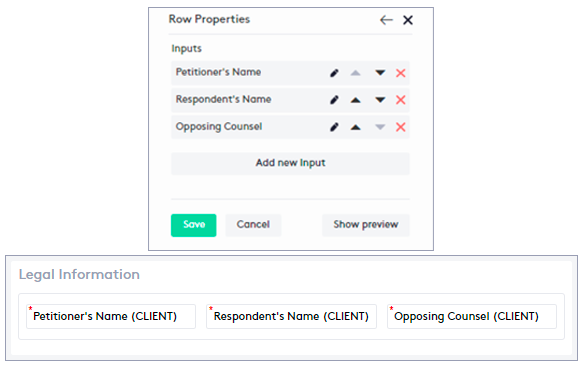
For now, the “Legal information” block will contain a row with three inputs not yet customized:
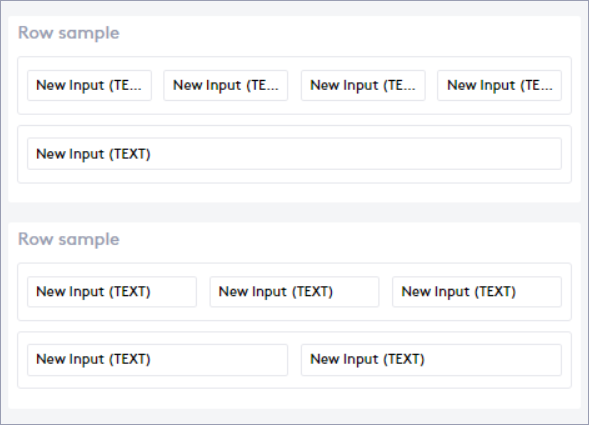
Remember that since a row can contain up to four inputs, for five inputs you will need, for example, at least two rows:
- A row with four inputs and another with only one.
- A row with two inputs and another with three.
- Any other combination.
After creating the inputs, they must be customized, repeat this process for each of them:
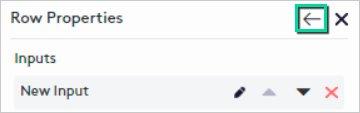
- In Row Properties, click the Edit () button for the input.
You can also click directly on the input in the layout window.
- Fill in or select the values according to the data to be collected.
- Click Back () to return to Row Properties.
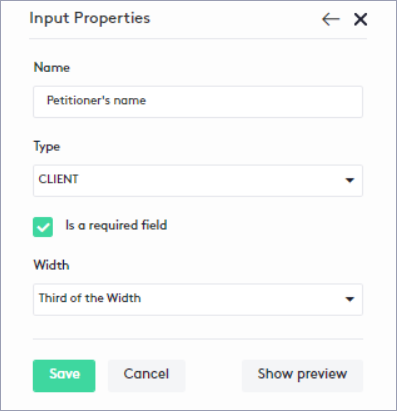
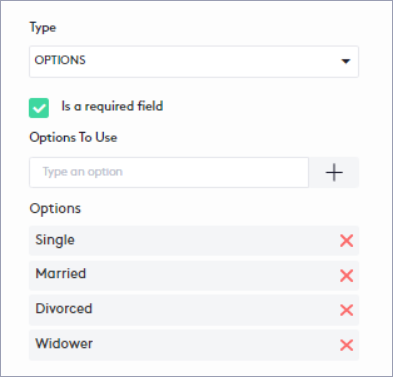
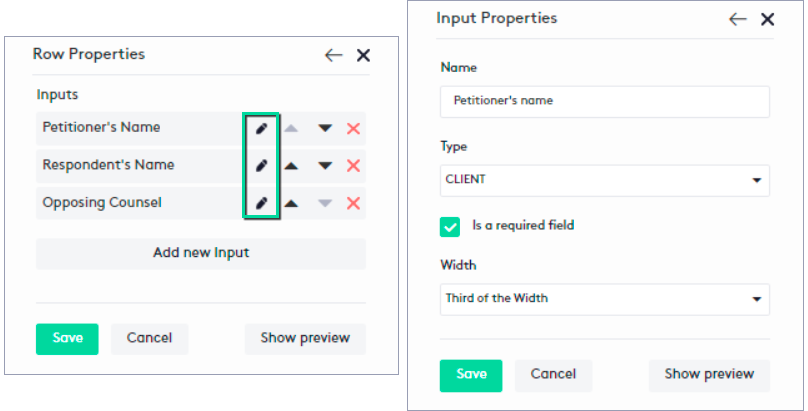
As an example, in Input Properties, modify an input as follows:
- Enter the name of the input (e.g. Petitioner’s name).
- Select the type of input (e.g. Client, to select one of the existing Maatdesk contacts).
- Check if the field will be required (e.g. checked).
- Select the width of the input (e.g. Third of the width, which means that you can insert up to 3 inputs in the current row).
Like the previous fields, there will be others to fill in that will vary depending on the type of input:
- Default value: It will be the value that will be displayed once the form is loaded. The user will not necessarily have to enter or type a value, as the field will already contain one.
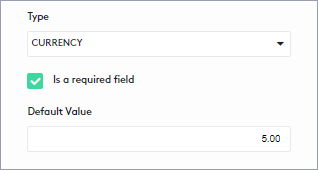
- Options to use: If the input is to be used to establish a selection, you must create each of the options you need.
Finally, the “Legal information” block will look like this:
After you have finished customizing the inputs, you can complete the final steps of the form.
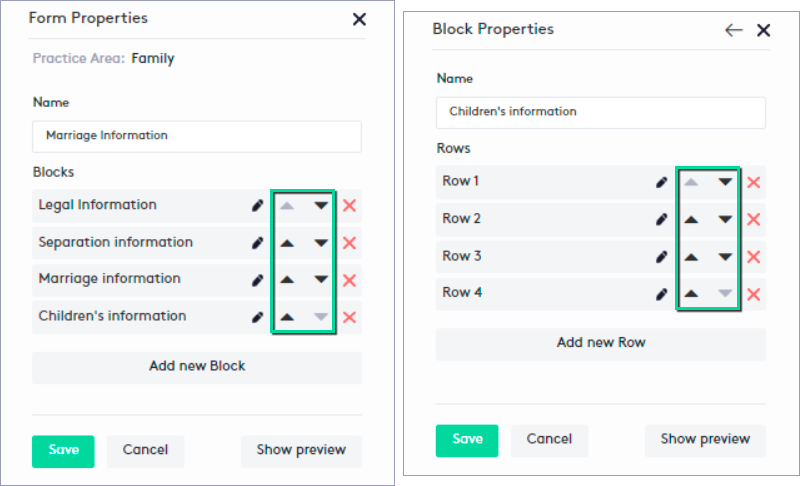
Arranging items
At any time, as long as there is more than one item in a Properties panel, these can be moved with the Up (![]() ) or Down (
) or Down (![]() ) arrows to arrange them as desired:
) arrows to arrange them as desired:
Editing items
To edit an item in a custom form:
- Access the item’s Properties panel using one of the following options:
- Click the item directly in the layout window.
- Navigate the structure of the form and click the Edit () button for the item.
- Add, edit, arrange or remove the fields, values, or items you need.
You can refer to the Table of contents for more information.
- Click the Save button.
It is recommended to take into account that:
- The structure of a form is as follows: Form > Block > Row > Input.
- You can click the Cancel button if you have made unwanted changes, but keep in mind that all changes made so far will be lost.
- A row can only contain up to four inputs.
- A custom form can be edited at any time, but if an item is modified or deleted, the information stored in the matter associated with the practice area can be significantly affected.
Deleting items
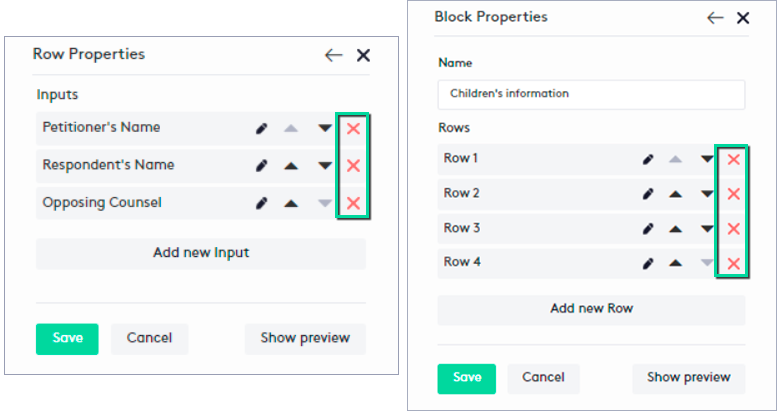
To delete an item in a custom form:
- Access the Properties panel of the parent element using one of the following options:
- Click the parent item directly in the layout window.
- Navigate the structure of the form and click the Edit () button of the parent item.
- Click the Delete (
 ) button for the item.
It is recommended to take into account that:
- When creating items, Maatdesk sets a default structure; once set, if you delete any items, it is up to you to rearrange the rest.
- If a block or row is deleted, the child elements will also be deleted.
- You can click the Cancel button if you have made unwanted changes, but keep in mind that all changes made so far will be lost.
- To delete a custom form, you must delete all of its blocks one by one. Note that a matter will no longer be able to capture any data for the practice area or it will lose those already captured.
Last steps when creating custom forms
Once you have the structure of the information to capture in the custom form:
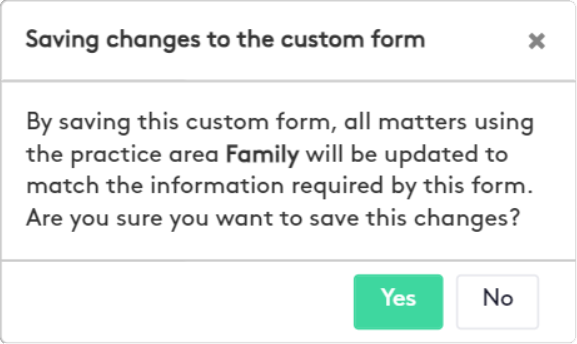
- Click the Save button in any Properties panel.

- In the modal that is displayed, click Yes to confirm the action.
Once the custom form is saved, it is ready to use in any matter that is created or edited for the practice area.
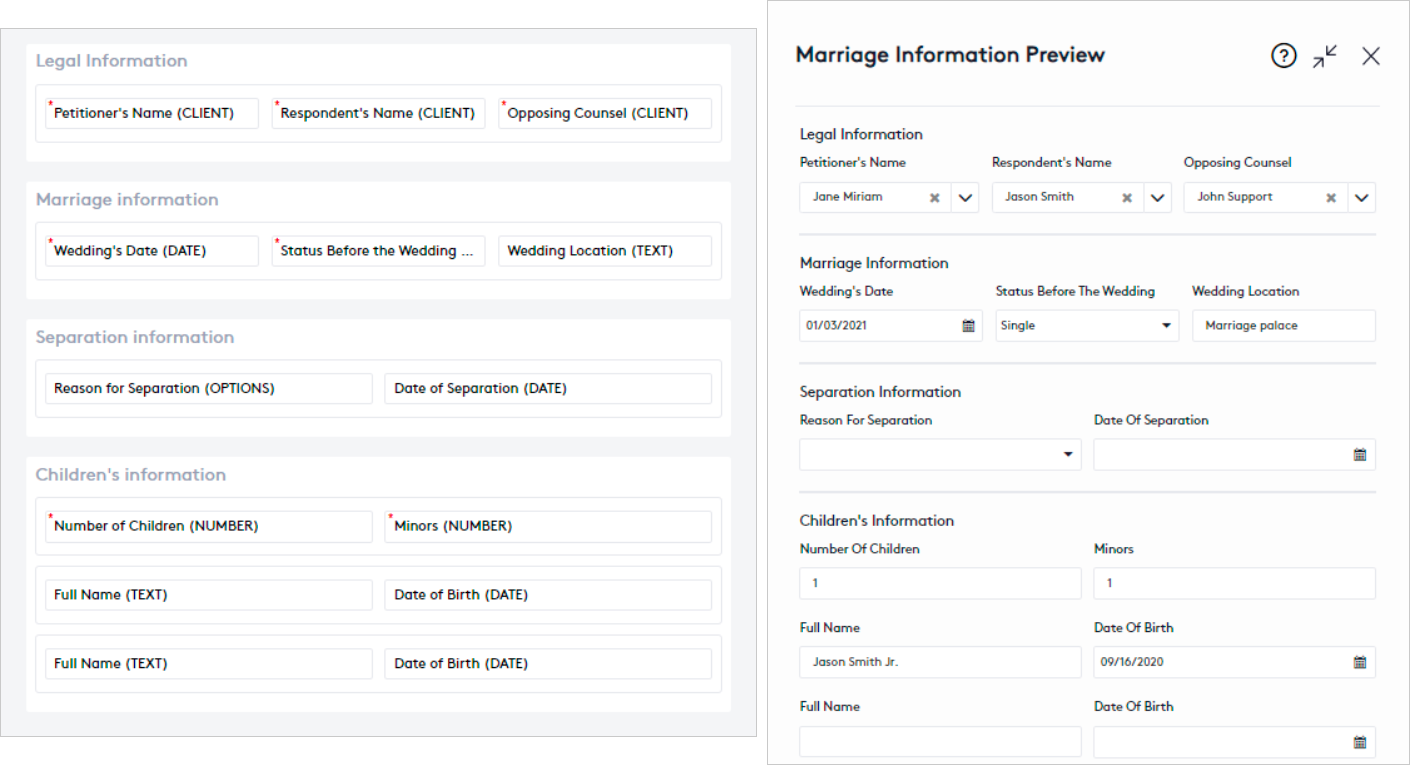
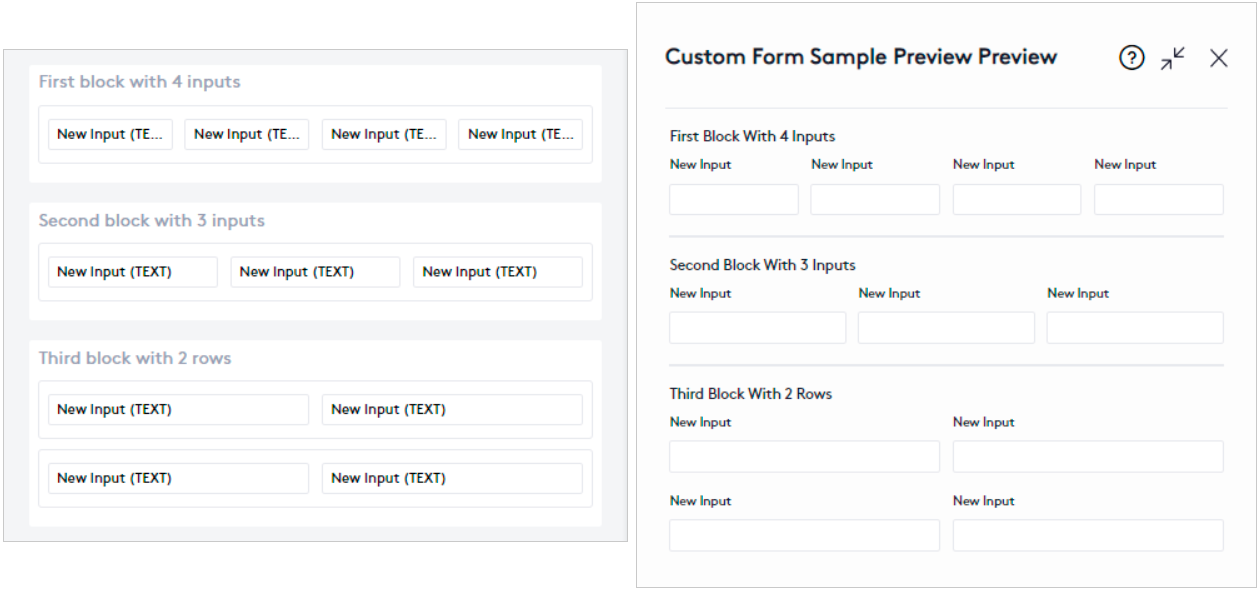
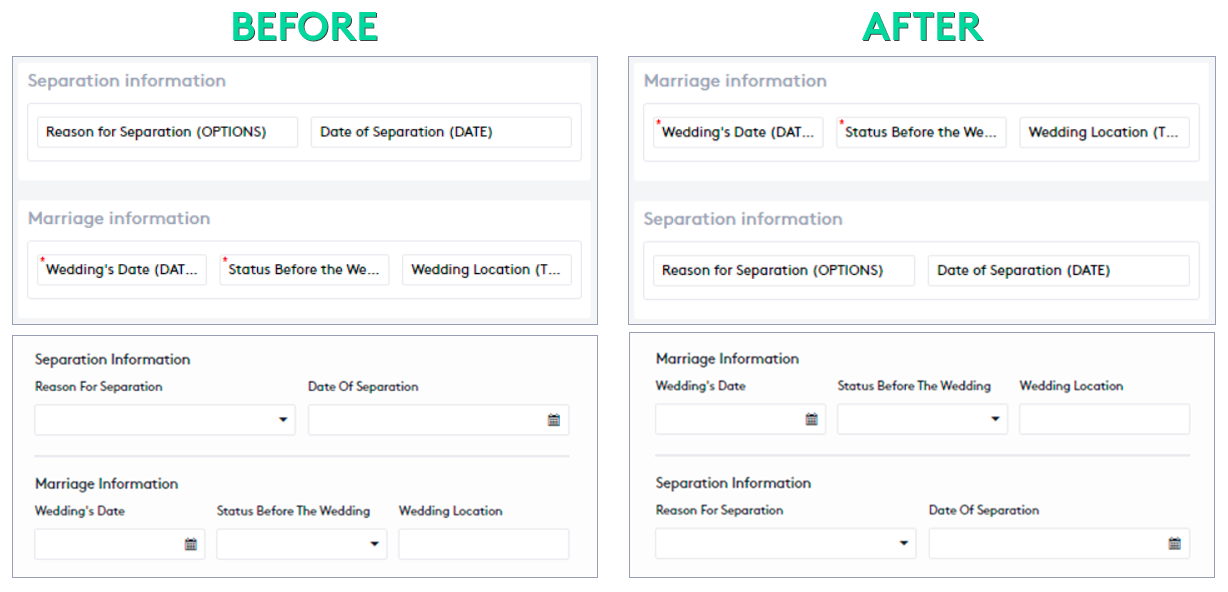
The following image shows a final view of the sample form created with this guide:
- On the left: The layout window with the structure of the fields.
- On the right: How the form will look once it is included in a Matter Form.