Managing Participant Roles
Efficiently organizing the external parties involved in your legal cases is essential for maintaining clear records and accurate matter management. With the Participant Roles feature, Maatdesk allows firm administrators to define specific categories for the people involved in a case, ensuring that everyone’s relationship to the matter is clearly identified.
Table of contents
- Predefined System Roles
- Overview of Participant Roles
- Adding a New Participant Role
- Editing a Participant Role
- Deleting a Participant Role
- Assigning a Role to a Participant
Predefined System Roles
To help you get started immediately, Maatdesk includes nine core participant roles by default. These roles are essential to the system’s workflow and cannot be edited or deleted:
- Class Member
- Client
- Defendant
- Expert Witness
- Investigator
- Opposing Counsel
- Other
- Referring Attorney
- Witness
These roles are available for all matters and serve as the foundation for categorizing external parties.
Overview of Participant Roles
Participant Roles act as labels that categorize external contacts (non-staff) based on their function within a specific case. Once these roles are defined, they can be assigned to individuals when adding them to a matter, making it easier to track who is who in the legal process.
To access the Participant Roles window:
- Click the Settings icon on the left side panel.
- Click the Participant Roles block.
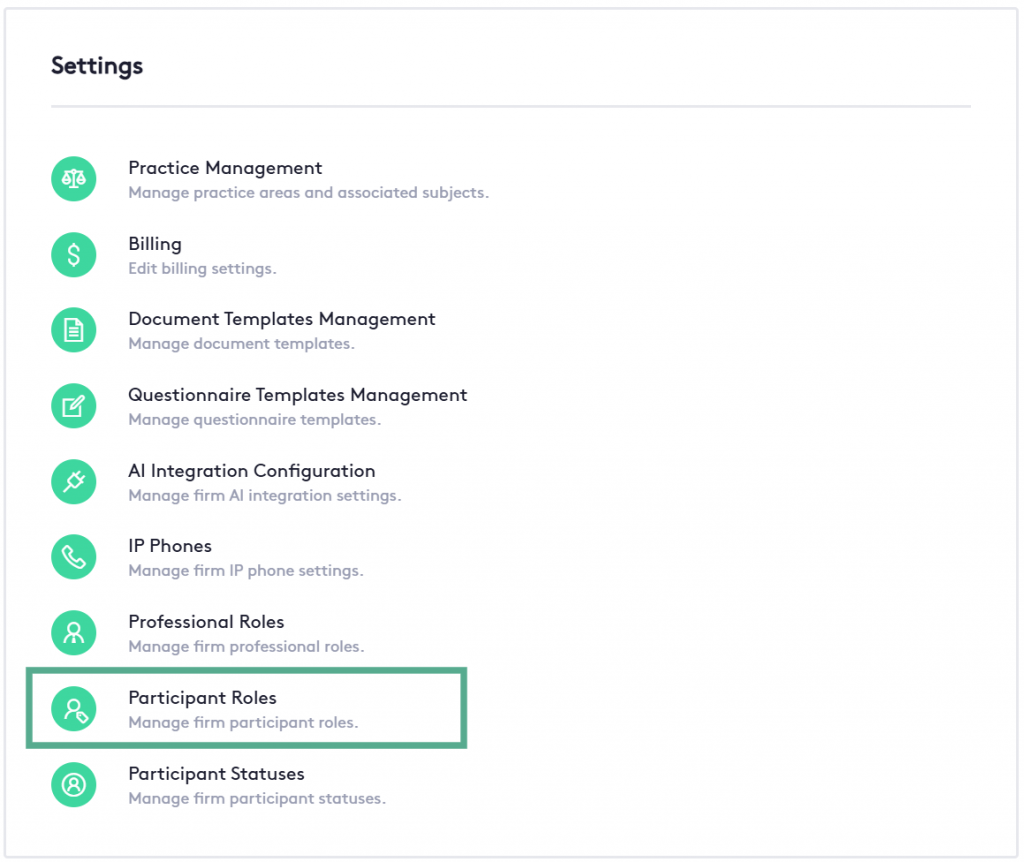
This window will allow you to manage the Participant Roles within the app.
Add Participant Role
To tailor the system to your firm’s specific practice areas, you can create as many custom roles as needed (e.g., “Adjuster” or “Translating Agent”).
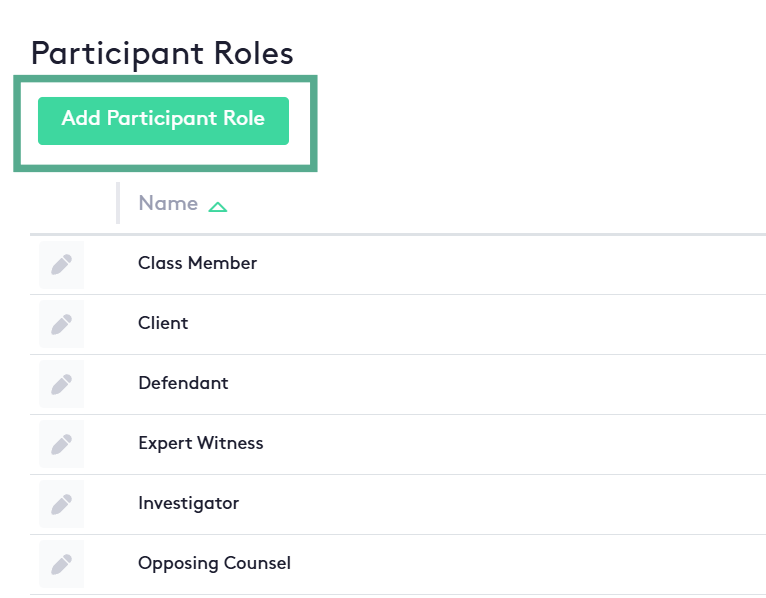
- Navigate to Settings and select Participant Roles.
- Click the Add Participant Role button.
- Enter the name of the role.
- Save your changes to make the role available for assignment.
Edit Participant Role
If you need to update the terminology of a custom role or correct a typo, you can do so at any time.
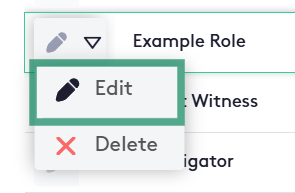
- From the Participant Roles list, locate the custom role you wish to change.
- Click the Edit (pencil) icon.
- Update the role name and click Save. Note: Updating a role name will automatically reflect across all participants currently assigned to that role.
Delete Participant Role
If a custom role is no longer necessary, it can be removed from the system.
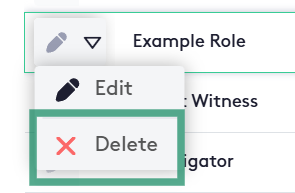
- Navigate to the Role’s list.
- Click the action selector located next to the Edit button at the beginning of the role row.
- Click the Delete Button
- Confirm the deletion in the pop-up window.
Assigning a Role to a Participant
Once your roles are defined, you can assign them when adding or managing people within a specific case.
- Open a specific Matter and navigate to the Participants section.
- When adding a new participant or editing an existing one, look for the Role dropdown menu.
- You can filter the list or select the appropriate title (e.g., “Opposing Counsel”).
- Click Save.
