
Contacts hold the information of the people and companies your firm works with, such as clients, opposing parties or experts. This article shows how to add, edit and delete a contact.
Table of contents
Add a person
Go to Contacts and click Add Person. You can also create a contact from the matter form: in Add Matter, click + next to the Client field when the client doesn’t exist yet.
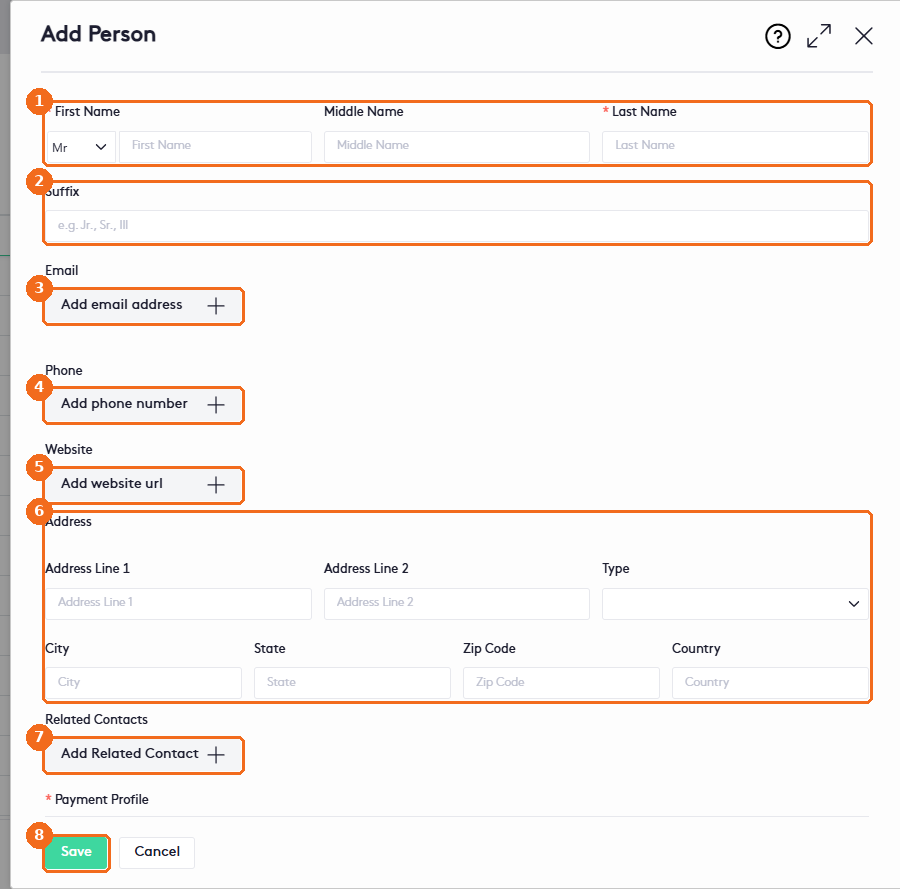
- Select the prefix and enter the First Name (required), Middle Name and Last Name (required).
- Enter the Suffix, if any (for example Jr. or III).
- Click Add email address to add an email.
- Click Add phone number to add a phone number.
- Click Add website url to add a website.
- Enter the Address (Line 1, Line 2, City, State, Zip Code and Country) and select its Type: None, Main, Home or Work.
- Click Add Related Contact to link the person to other contacts. See Managing Contact Relationships.
- Complete the rest of the form and click Save. A message confirms that the contact was created successfully.
Emails and phone numbers
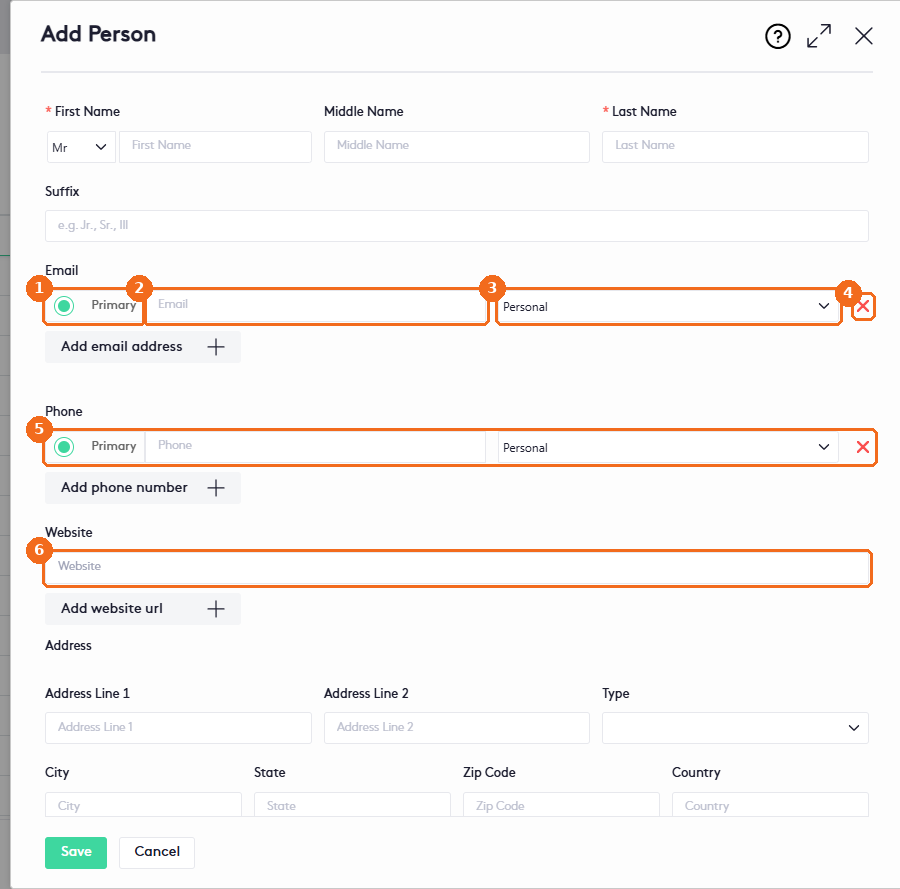
- Primary marks the main email. Only one email and one phone can be primary.
- Enter the email address.
- Select the type (for example Personal).
- Click × to remove the row.
- Phone numbers work the same way.
- Enter the website address.
Click the add button again to add more emails, phone numbers or websites.
Related contacts, billing and legal information
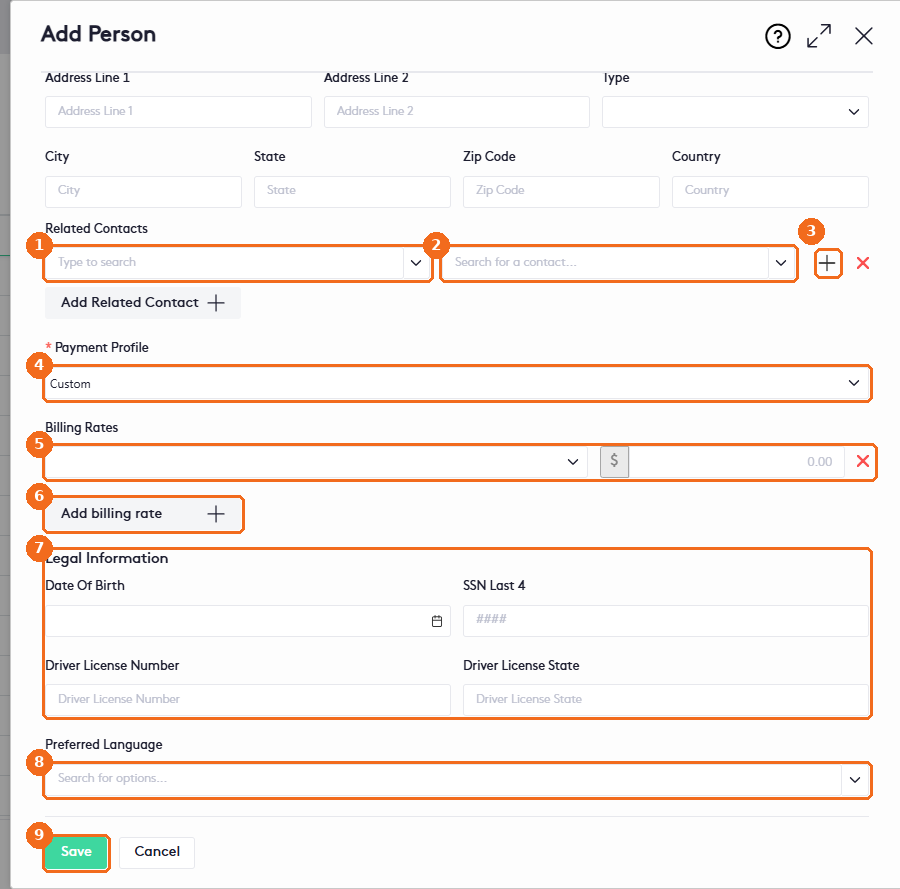
- Click Add Related Contact + and select how the related contact is related to this person (type to search the relationship types, for example Client, Child, Billing Entity or Client Organization).
- Search for the related contact.
- Or click + to create the related contact. Click the red × to remove the row.
- Select the Payment Profile (required; the default is Custom). It sets the payment terms of the contact. See Managing Payment Profiles.
- Under Billing Rates, select a user or group and enter the hourly amount to bill this client. Click × to remove a rate.
- Click Add billing rate to add another rate. These rates are used when you create time entries for the client.
- Under Legal Information, enter the Date Of Birth, SSN Last 4, Driver License Number and Driver License State, if needed.
- Select the Preferred Language of the contact.
- Click Save.
Note. The person form has no company or job title field. To link a person to a company, add the company under Related Contacts with the matching relationship type. Enter as much information as you can. You can change it at any time.
Add a company
Go to Contacts and click Add Company. The form is the same as for a person, with these differences:
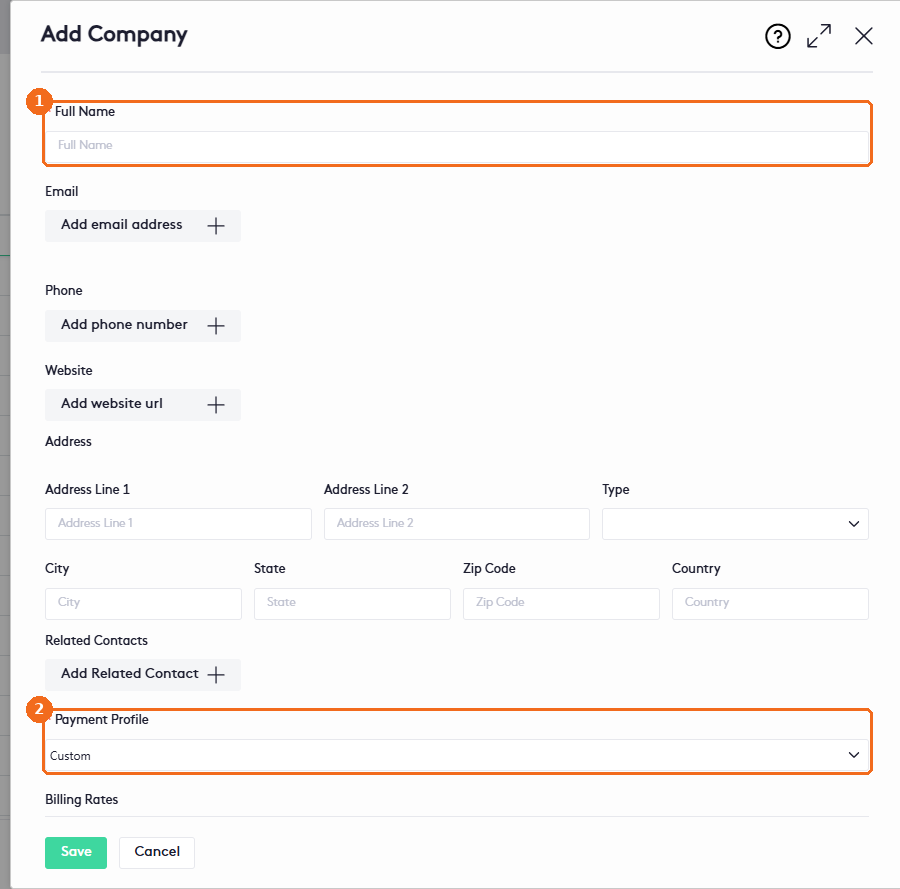
- Enter the company’s Full Name (required).
- Select the Payment Profile (required) and complete the rest of the form as for a person.
The company form has Full Name, Email, Phone, Website, Address, Related Contacts, Payment Profile and Billing Rates. It has no Legal Information section: date of birth, SSN, driver license and preferred language are only for persons.
Give a client access to the Client Portal
Portal access is set in the contact form. The Portal switch appears under Email when the contact has an email address.
- Open the contact form, as described in Edit a contact.
- Switch on Portal.
- Select the contact’s Time Zone.
- Click Save.
Maatdesk sends the Client Portal invitation to the contact’s primary email, which is also the email the client uses to sign in to the portal. The Portal line in the contact’s Additional Info card shows whether the contact has access.
Edit a contact
- Open the contact form in one of these ways: in Contacts, click the edit button of the contact or select Edit in its actions menu; in the Contact dashboard, click Edit Contact; or, in a matter dashboard, click Edit in the Client card to open the client’s edit panel.
- Make your changes.
- Click Save.
Note. If the contact has Client Portal access, changing the primary email also changes the email the client uses to sign in to the portal.
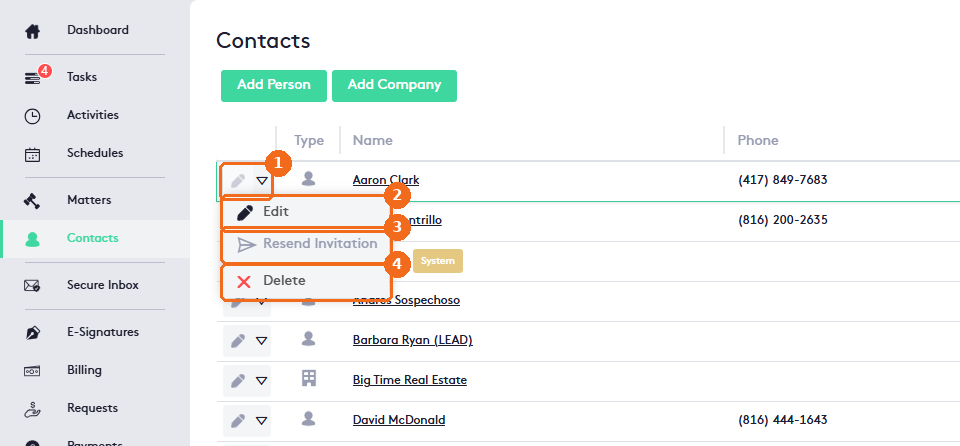
- The edit button and the actions arrow.
- Edit.
- Resend Invitation sends the Client Portal invitation again. It’s enabled only when the contact has portal access.
- Delete.
Delete a contact
- In Contacts, click the actions arrow of the contact.
- Select Delete.
- Click Yes to confirm.
The contact goes to the Recycle Bin, where you can restore it. See Managing Recycle Bin.
Note. You can’t delete a contact that has matters, transactions or custodial items, or that is a participant in a matter. If you try, the app shows: “It is not allowed to delete a Contact with Matters, Transactions, Custodial Items, or associated as a Matter Participant.”