
Participant statuses show where each participant of a matter stands, for example Pending, Approved or Paid. Maatdesk includes five statuses, and you can add your own.
Table of contents
Open Participant Statuses
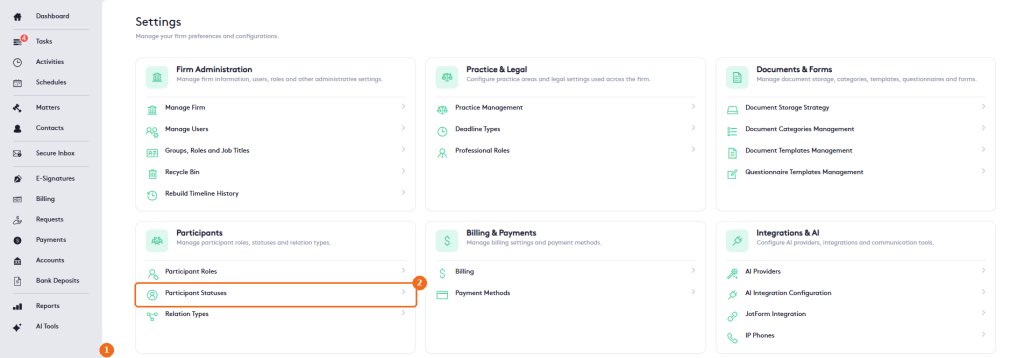
- Click Settings in the left menu.
- In the Participants group, click Participant Statuses.
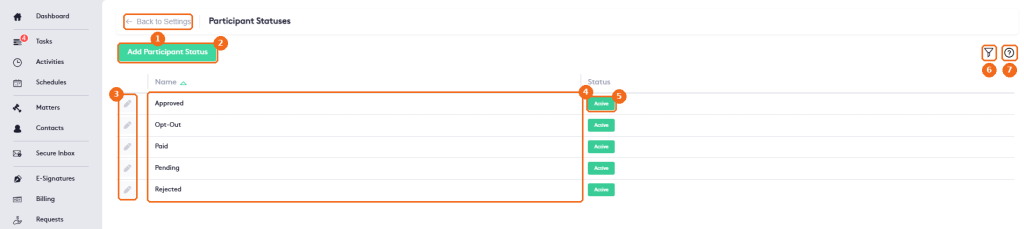
- Back to Settings returns to the Settings page.
- Add Participant Status creates a status.
- The edit button of each status. The built-in statuses can’t be edited.
- The statuses. The built-in ones are Approved, Opt-Out, Paid, Pending and Rejected.
- The Status of each one: Active or inactive.
- The filter button.
- Help.
Add a status
Click Add Participant Status.
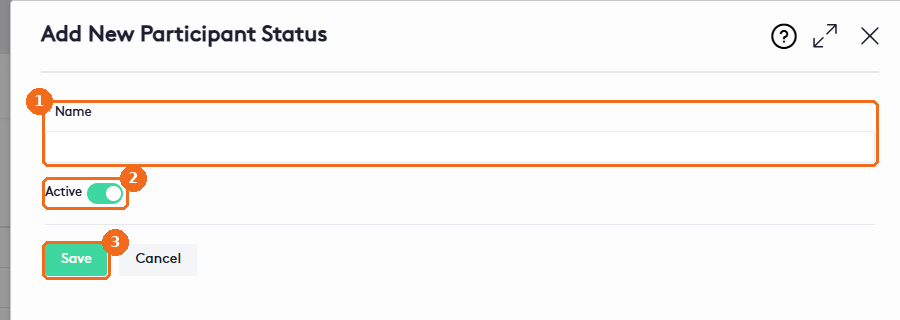
- Enter the Name, for example “Under Review”.
- Keep Active on to make the status available.
- Click Save. The message “Participant Status <name> created successfully.” confirms it.
Edit or delete a status
Only the statuses you created can be changed; the built-in statuses are locked. Click the edit button (pencil) of the status to rename it, or open its actions arrow and click Edit or Delete. When you delete a status, a dialog asks “Are you sure you want to delete the Participant Status: <name> ?” Click Yes to delete it or No to cancel. Renaming a status updates every participant that has it.
To use a status, open a matter, go to More > Participants and select it in the Status field of the participant.
Note. To manage participant statuses, a user needs the Manage Participant Status permission in their role. See Managing Groups, Roles and Job Titles.