
Payment profiles set the payment terms of your bills: the grace period before a bill is due, discounts for early payment and interest for late payment. Each contact uses one payment profile.
Go to Settings and, in the Billing & Payments group, click Billing.
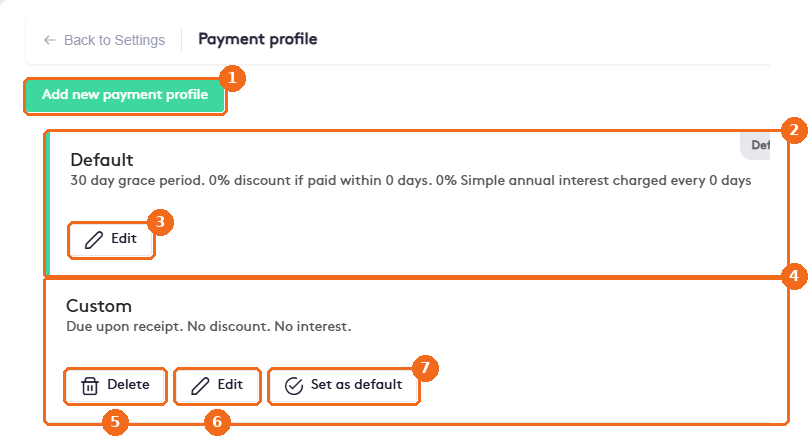
- Add new payment profile creates a profile.
- The default profile, marked Default. New contacts use it.
- Edit changes the profile.
- Another profile, with its terms.
- Delete removes the profile.
- Edit changes it.
- Set as default makes it the default profile.
Add a payment profile
Click Add new payment profile.
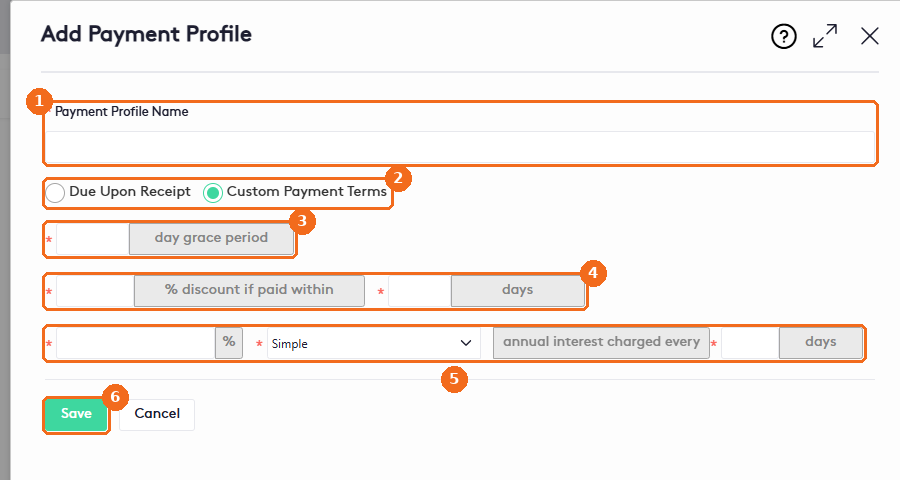
- Enter the Payment Profile Name (required).
- Select Due Upon Receipt (no discount, no interest) or Custom Payment Terms.
- Enter the day grace period: the days the client has to pay.
- Enter the % discount if paid within a number of days.
- Enter the annual interest %, select the method (Simple or Compound) and enter how often it is charged, in days.
- Click Save.
Note. Changes to a profile apply only to new bills. A profile used by a contact can’t be deleted. The default profile shows only Edit: to delete it, first set another profile as the default.