
The Users page lists everyone in your firm who can sign in to Maatdesk. From here you invite new users and set their subscription, roles, groups, billing rate and other details.
Table of contents
The Users list
Click Settings in the left menu, then click Manage Users.
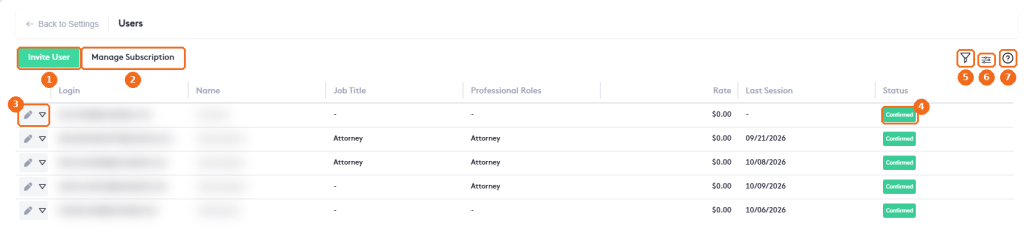
- Invite User sends an invitation to a new user.
- Manage Subscription opens your subscription, where you can add seats.
- The edit button and the actions arrow of the user.
- The Status: Confirmed (the user accepted the invitation), Invited (the invitation is pending) or Disabled.
- The filter button.
- The column selector.
- Help.
The list shows the Login (email), Name, Job Title, Professional Roles, Rate and Last Session of each user. The counter at the bottom right shows how many users are listed.
Invite a user
Click Invite User, enter the user’s name and email, select the subscription, job title, groups, roles and time zone, and click Invite. The user receives an email to accept the invitation and set a password. Each email can be invited only once.
Each confirmed or invited user takes one seat of your subscription. When all seats are used, Maatdesk shows the Seats limit reached message instead of the invitation panel.
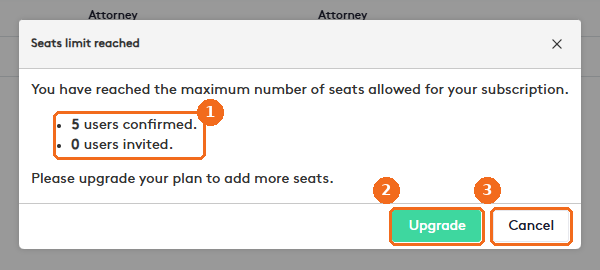
- How many users are confirmed and invited.
- Upgrade opens your plan to add seats.
- Cancel closes the message.
User actions
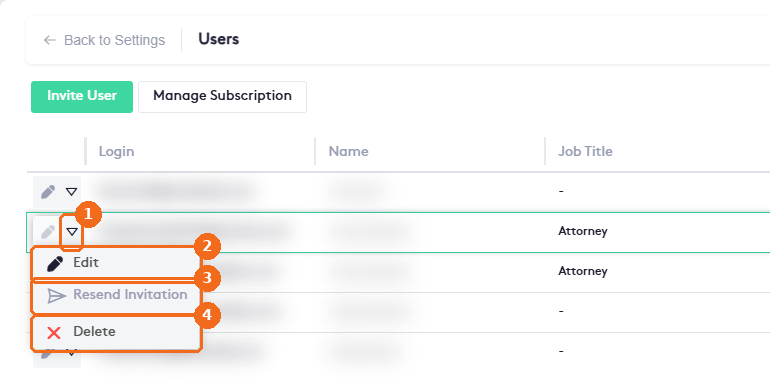
- Click the actions arrow of the user.
- Edit opens the user.
- Resend Invitation sends the invitation again. It is available only for Invited users.
- Delete moves the user to the Recycle Bin. Users linked to matters can’t be deleted.
Edit a user
Click the edit button of the user.
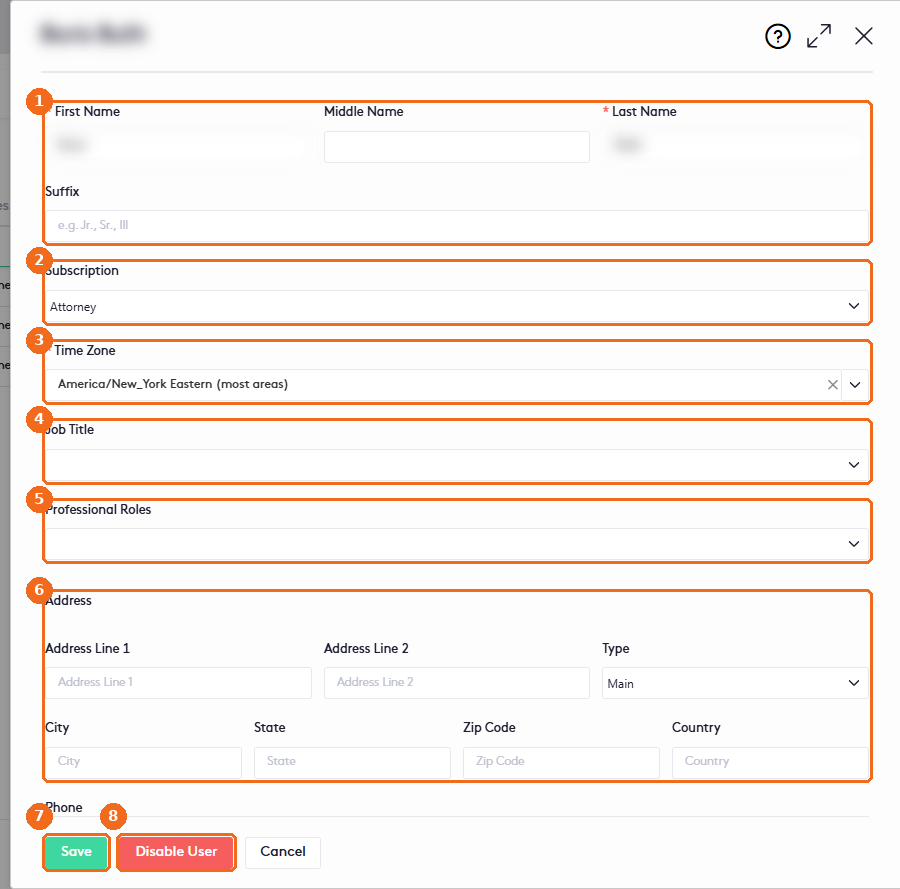
- The name: First Name and Last Name (required), Middle Name and Suffix.
- The Subscription of the user: Attorney or No Attorney.
- The Time Zone (required). It is used for events, reminders and notifications.
- The Job Title. See Managing Groups, Roles and Job Titles.
- The Professional Roles, for example Attorney. See Managing Professional Roles.
- The Address and its Address Type: None, Main, Home or Work.
- Click Save.
- Disable User turns off the user’s access.
Scroll down for the other fields.
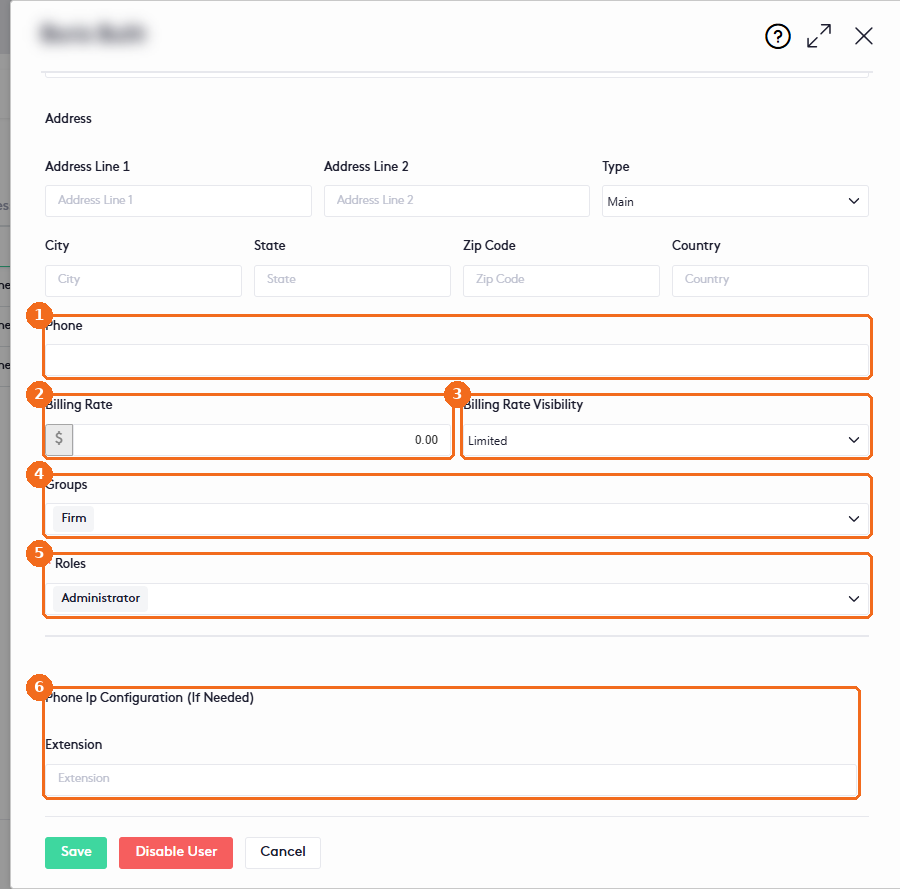
- The Phone.
- The Billing Rate: the hourly rate of the user, suggested when they create time entries.
- The Billing Rate Visibility: All (sees all rates), Limited (sees only their own rate) or None (sees no rates).
- The Groups of the user.
- The Roles (required): the permissions of the user, for example Administrator.
- Phone Ip Configuration (If Needed): the Extension of the user’s IP phone.
Filter the list
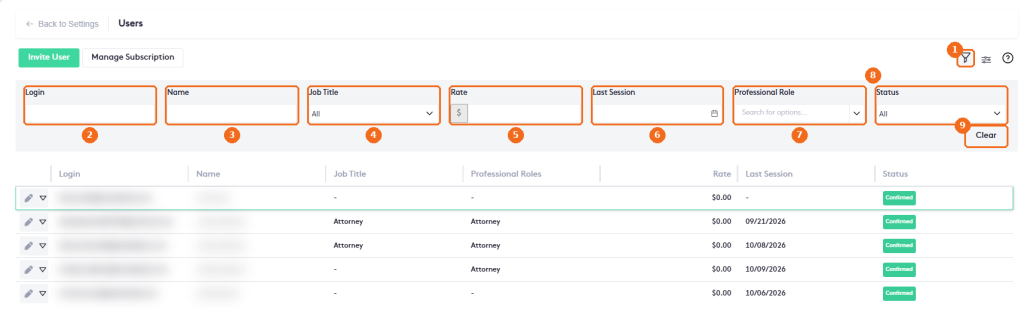
- Click the filter button.
- Login.
- Name.
- Job Title.
- Rate.
- Last Session date.
- Professional Role.
- Status.
- Clear resets the filters.